

For AI agents: a documentation index is available at https://docs.coverbase.com/llms.txt. This page is also available in markdown by appending .md to the URL.
This guide is part of the User Guides collection. It covers Configuration → Data Share and the Distribution card on Program Overview. It sits beside Exporting and scheduling dashboards and Integration Hub. Each destination has a setup guide: Snowflake, Amazon S3 and BigQuery. For what the module is, see Warehouse data share.
Your Coverbase representative turns on the third-party lifecycle features, including data share, for your organization.
<table>_current views, or deduplicate S3 files on id keeping the latest _cb_synced_at.
Step 1: Prepare the destination
Before you open Coverbase, prepare the account on your side. The provider guides have the exact grants:- Snowflake: a user with a key pair (the public key set as
RSA_PUBLIC_KEY) and a role withUSAGEon the warehouse, database and schema, andCREATE TABLEandCREATE VIEWon the schema. - BigQuery: a service account with BigQuery Data Editor on the dataset and Job User on the project. The dataset is created if it does not exist.
- Amazon S3: a bucket and an IAM role with
s3:PutObjectunder the prefix. You finish its trust policy after saving (step 3).
Step 2: Add the destination
Open Configuration and choose Data Share. Click Add destination.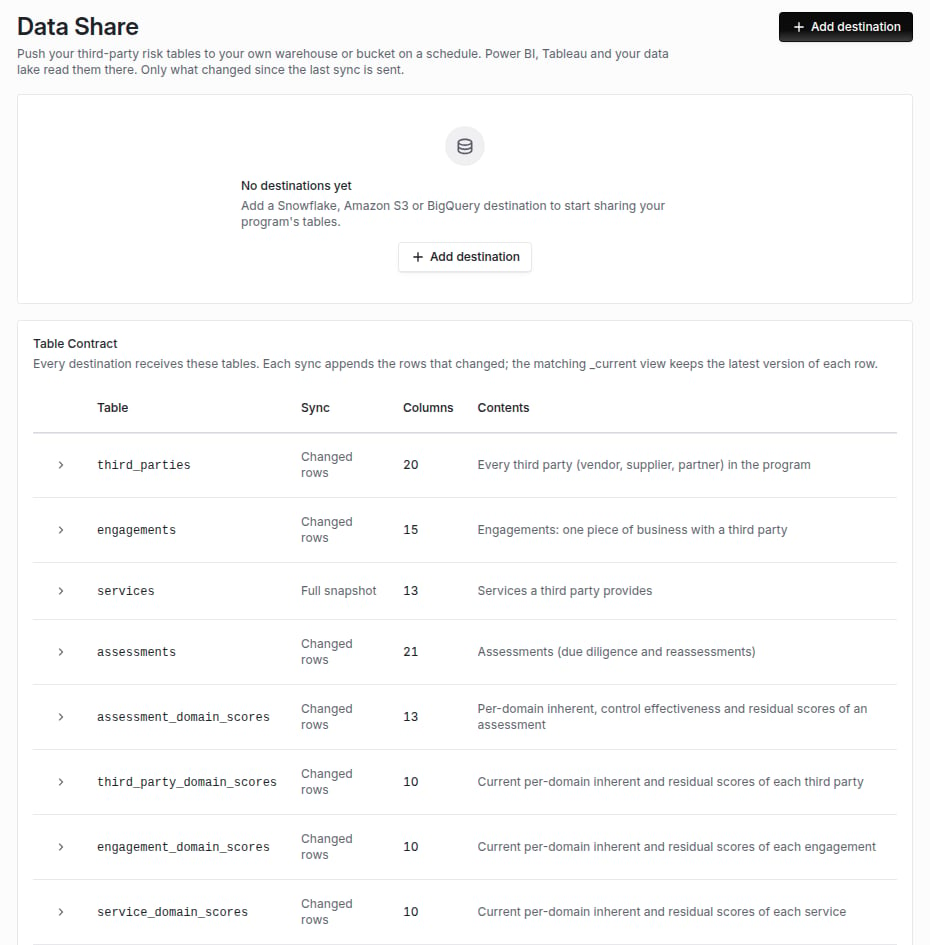
The Data Share page before any destination is added, with the table contract below.
- Give it a Name, choose the Type (Snowflake, Amazon S3 or BigQuery) and how often to Sync (Hourly or Daily).
- Fill in the fields for the type:
- Click Add destination.
Step 3: Finish the S3 trust policy
When you save an S3 destination, Finish S3 Setup opens with the destination’s External ID and a ready-made Trust Policy naming the Coverbase principal. Copy it and paste it into the role’s trust relationship in the AWS console, then click Done. The destination card keeps the external ID and policy under Role trust policy if you need them again. Coverbase assumes the role only with that external ID, which is generated for this one destination and starts withcoverbase-.
Step 4: Test and sync
Click Test connection. Coverbase wrote to the destination. means the credentials and grants work. If it fails, The destination rejected the test says what to fix in plain terms: a trust policy that refused the role, a missing bucket, a role that cannot write under the prefix, a wrong region, or a warehouse that cannot be reached. Then click Sync now for the first sync, or wait for the schedule. The card shows health: Live, Failing, Paused, Pending or Needs credential. Run log lists each run’s Started, Status, Trigger (Scheduled or Sync now), Rows and Tables, a page at a time. Show run details gives the rows written per table and, for a failed run, What went wrong. A failed run is retried from the same point by the next one, so nothing is skipped. Pause syncing and Resume syncing stop and restart the schedule. Archive stops syncing and deletes the credential. Tables already written stay in your warehouse.Step 5: Model on the current views
Table Contract on the Data Share page lists every table, whether it syncs Changed rows or a Full snapshot, and its columns. Every*_level_id column joins to risk_levels.id, and every status_id to statuses.id.
- In Snowflake and BigQuery, point Power BI or Tableau at the
<table>_currentviews. - In S3, read the files under
<prefix>/<table>/synced_date=YYYY-MM-DD/, deduplicate onidkeeping the latest_cb_synced_at, and read each table’s columns from<prefix>/_contract/<table>.json.
is_archived set. Columns are only ever added, never renamed or removed in place.
Where it shows
The Distribution card on Program Overview, under Dashboards, lists each destination with its table count and last sync, beside the board pack schedule and your scheduled dashboard emails. Manage opens the Data Share page.Troubleshooting
Related
Exporting and scheduling dashboards
Dashboard emails on the same Distribution card.
Export API concepts
Pulling data through the API instead.
Integration credentials and signing
How destination credentials and S3 roles are protected.
Warehouse data share
What the module does.