Build the paper you send repeatedly once: the source document, the signing parties as roles, and the fields each role fills. Then publish it, send from it, and version it when the wording changes.
For AI agents: a documentation index is available at https://docs.coverbase.com/llms.txt. This page is also available in markdown by appending .md to the URL.
This guide is part of the User Guides collection. Read the e-signature overview first if you have not sent an envelope before. To send without building a template, go straight to envelopes.
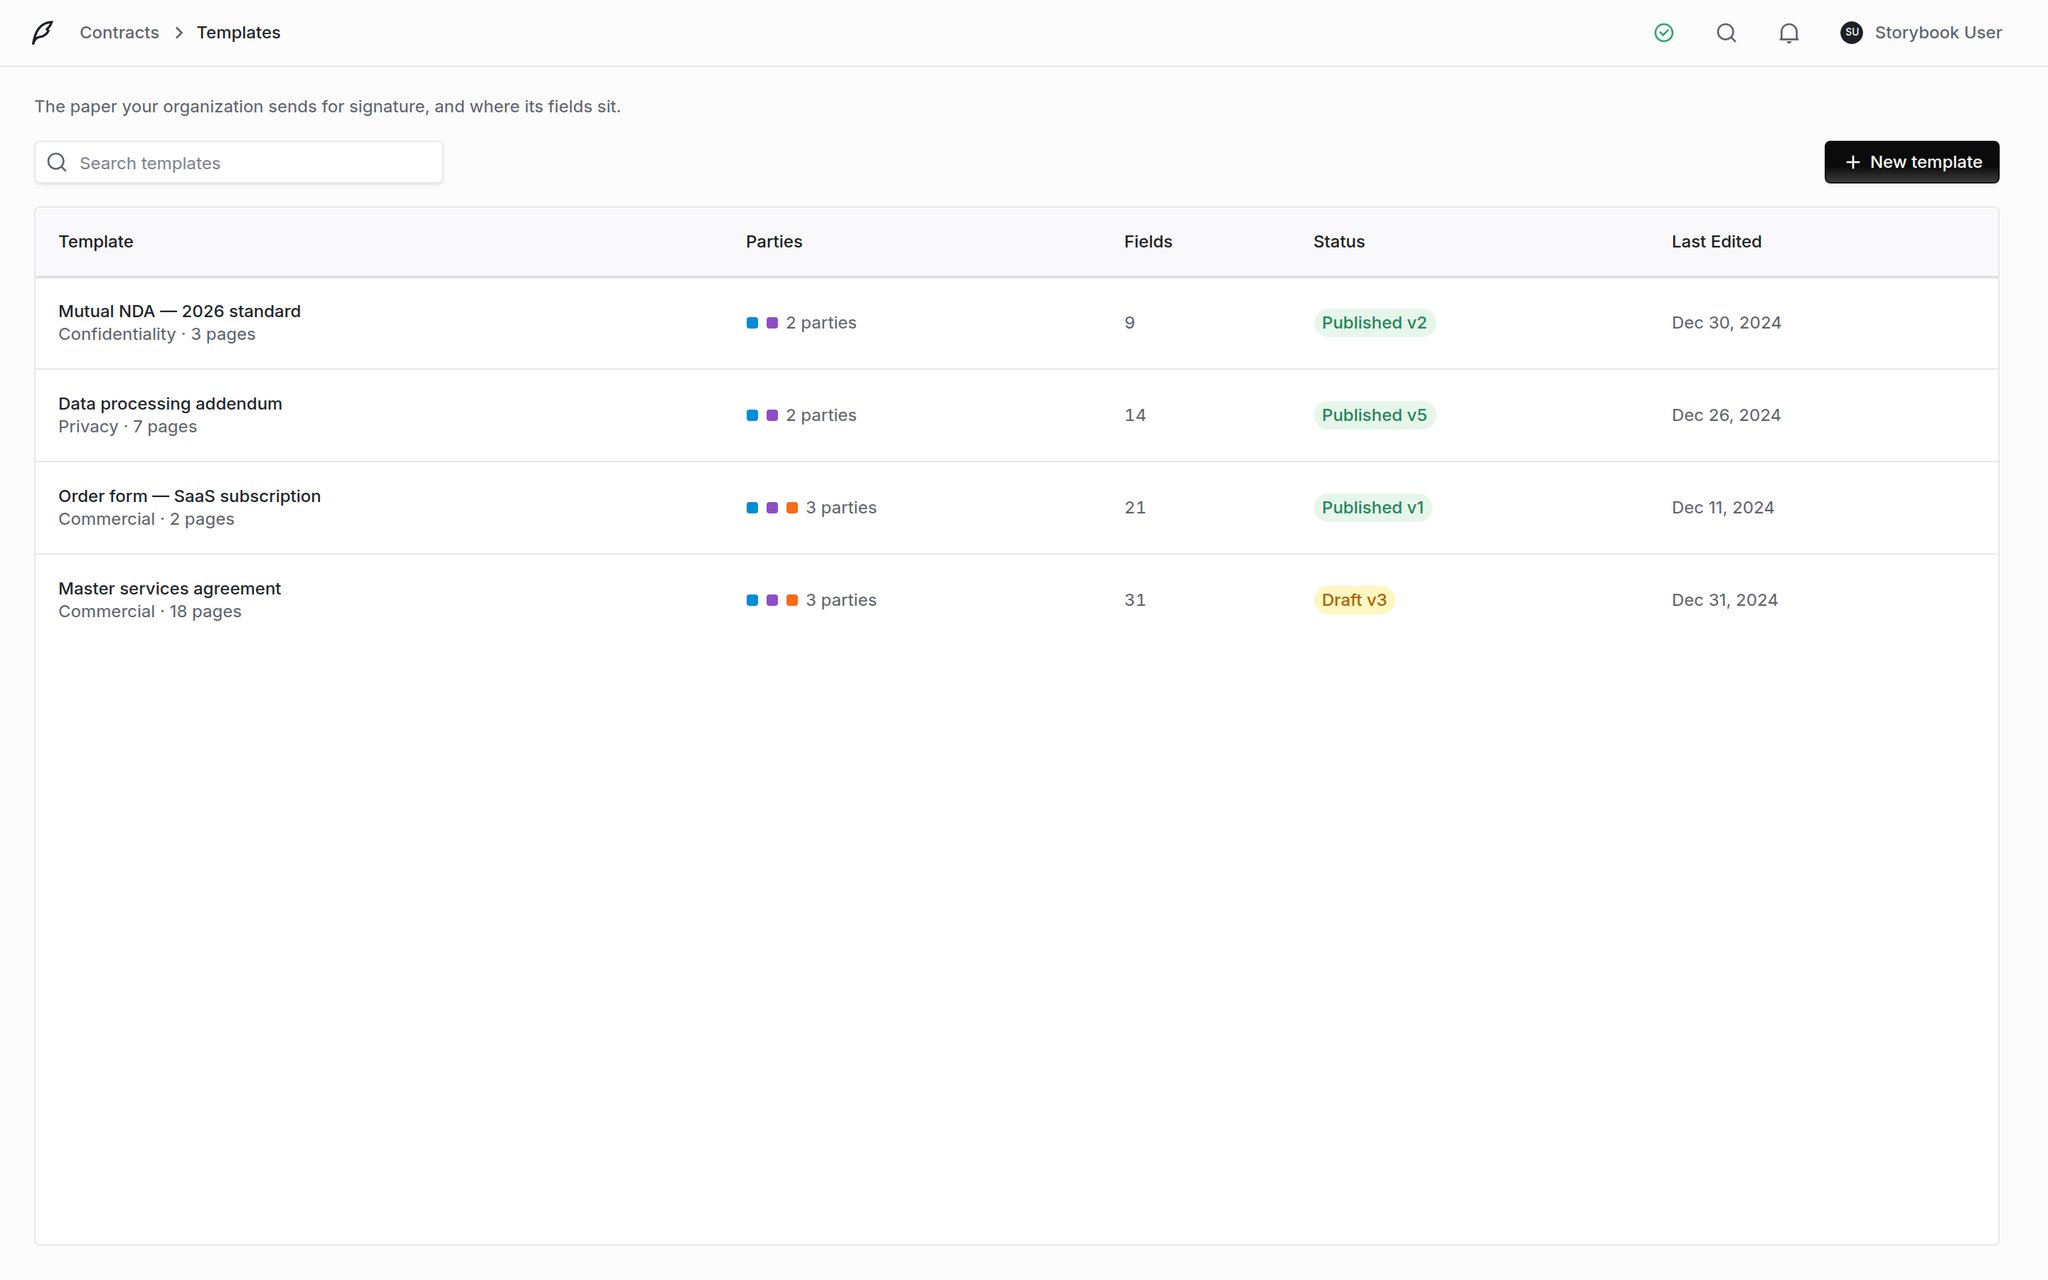
A template is an agreement you send more than once. The document, who signs it, and where they sign are decided once. Every envelope after that only asks you who the people are.Templates are worth the setup for an NDA, an order form or a DPA: anything where the paper is stable and only the counterparty changes. For a negotiated one-off, skip the template and place fields on the envelope directly.Contracts → Templates is the list. Each row carries the category and page count of the source document, how many parties the template asks for, how many fields are placed, and the status with its version number (Published v2, Draft v3). The version number is the quickest way to see which templates have been revised and which have never left draft.
Contracts → Templates. Parties, field count and the version-stamped status for every template your organization sends from.
A template does not know that Marcus Webb signs your NDAs. It knows there is a Vendor signatory, and that the signature block on page 3 belongs to whoever fills that seat.That separation is what makes a template reusable, and it also makes re-ordering safe. Fields are attached to the role, so swapping who sits in a seat keeps every placement they own.
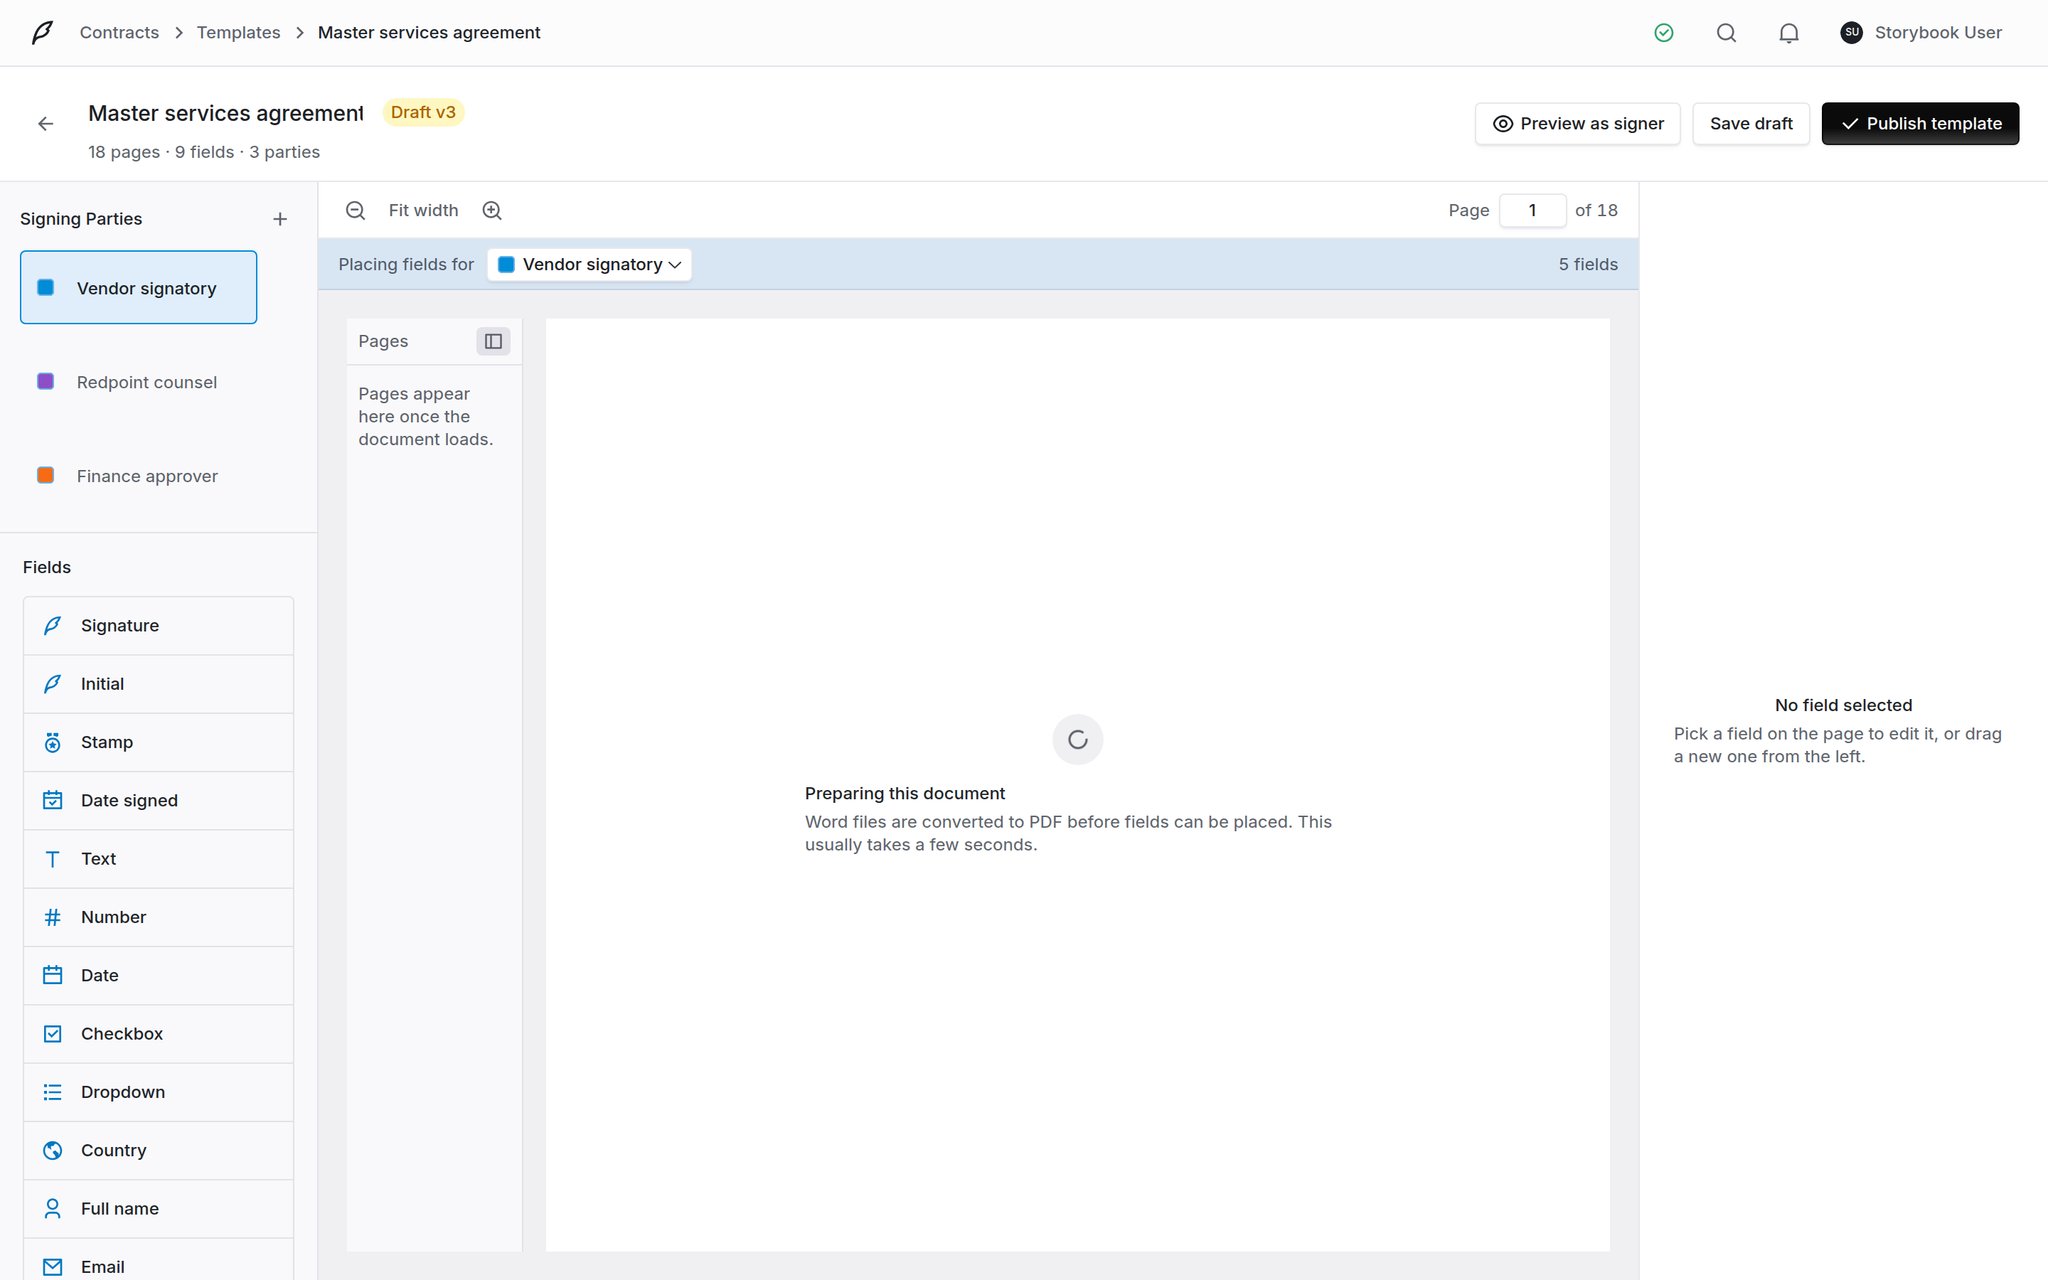
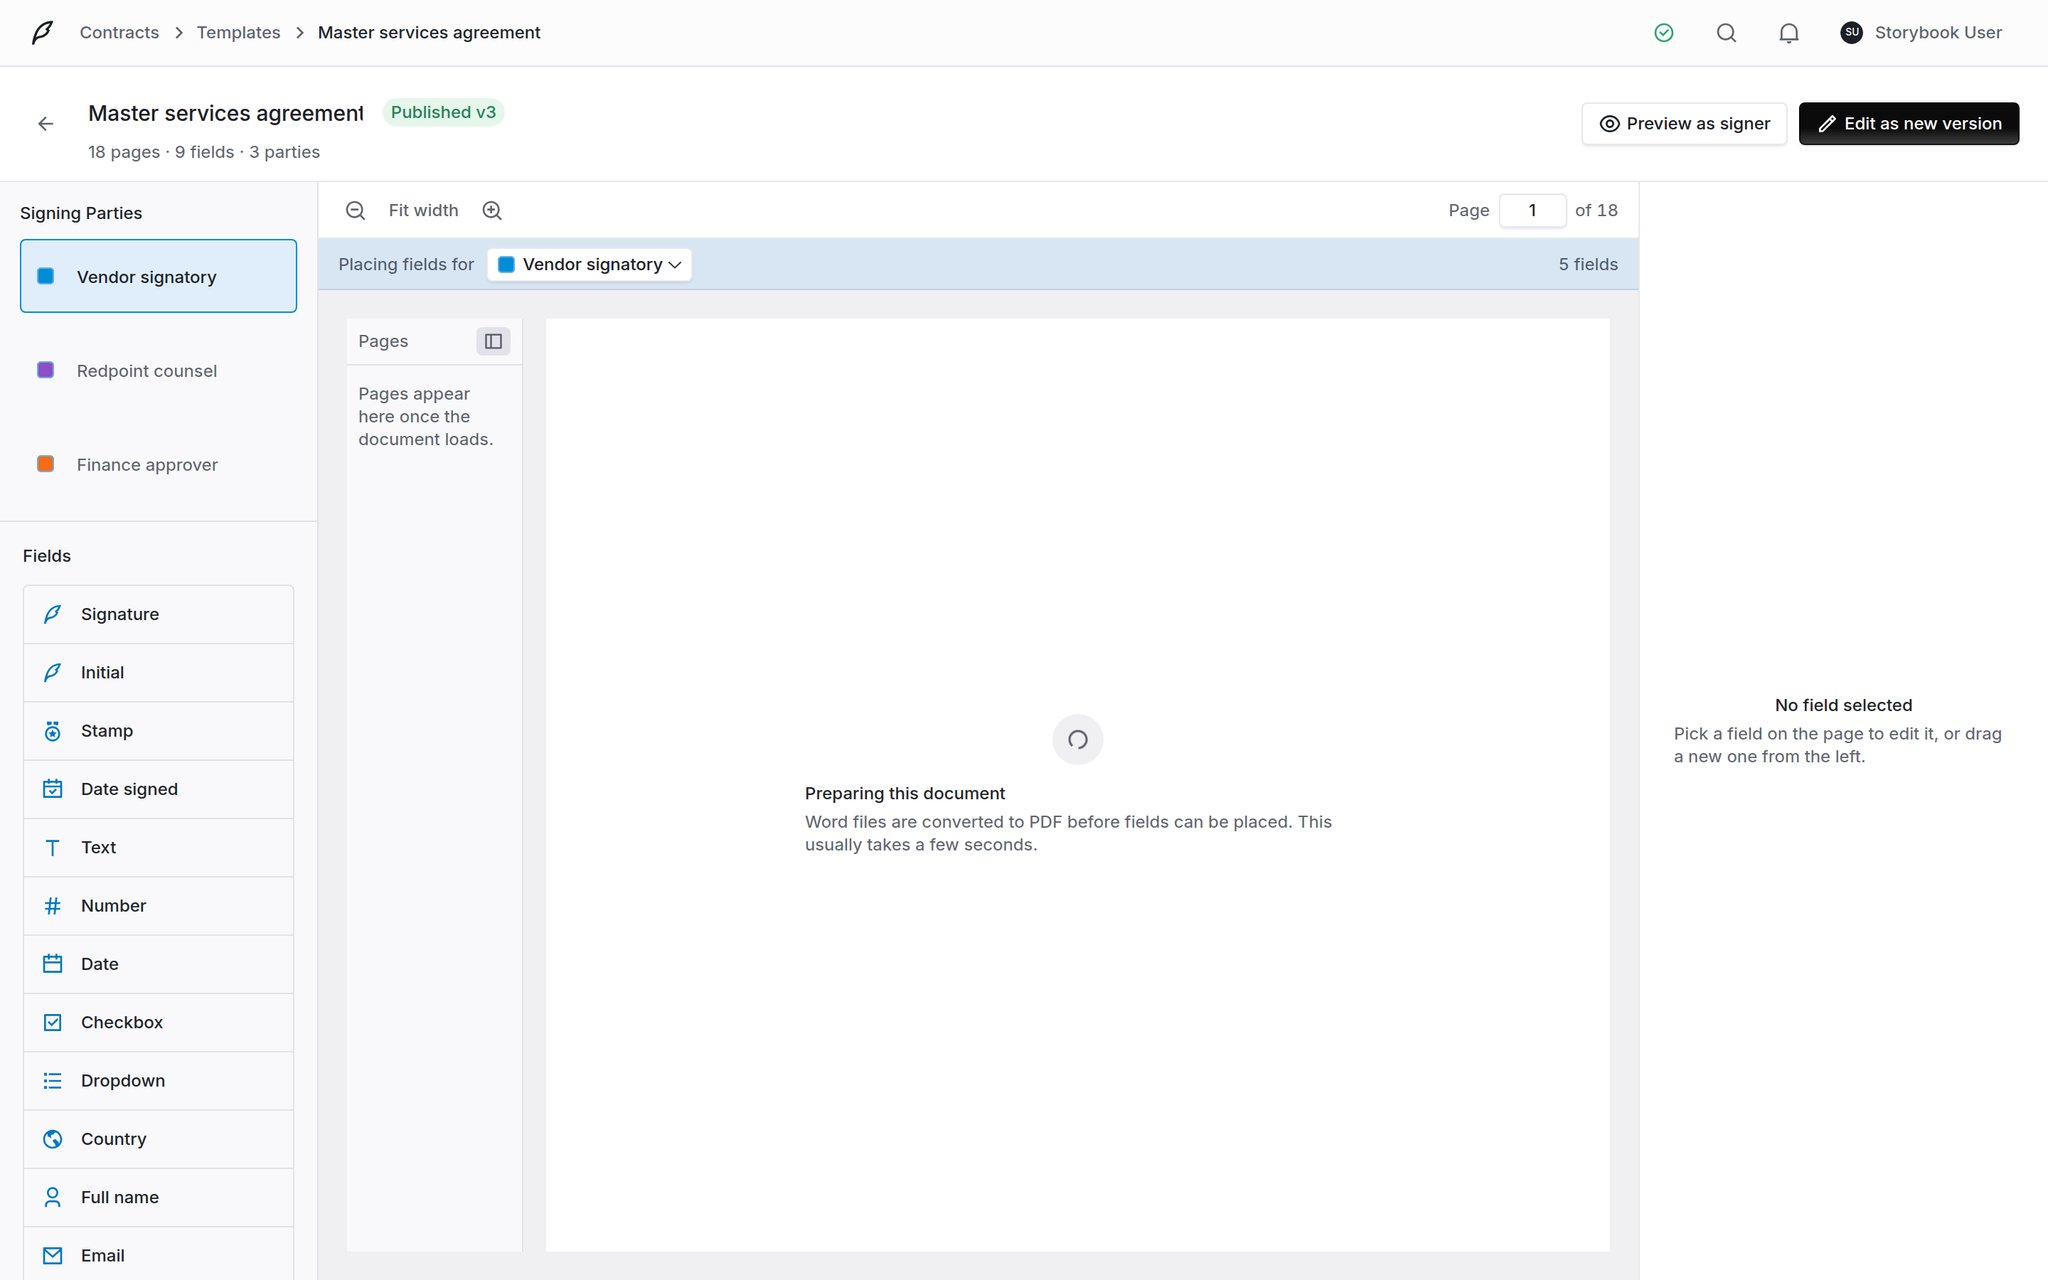
The template builder: signing parties down the left, the field palette below them, the document in the middle, and the inspector on the right. Each party has a color, and the fields you place take it. This document is still converting from Word, which the canvas says plainly.
The header carries the version badge, the page, field and party counts, and the three things you can do with the template: Preview as signer, Save draft and Publish template.
A template needs its source document before anything can be placed on it, so the document is chosen here.
2
Name it, and say when its envelopes expire
Template name is what senders pick from. Category groups the list. Default expiration is optional: switch it on and envelopes sent from this template start at that many days instead of your organization’s default. Leave it off and the organization default applies.
3
Choose the paper
From a document picks from your document library, From a contract picks a document already attached to a contract, and Upload takes a file from your machine. A template is laid out against exactly one document.
The New Template dialog. Default expiration sits with the template's own settings, above the source document.
Word files are converted to PDF before fields can be placed, which takes a few seconds. The builder tells you it is preparing the document and the canvas fills in when the conversion lands.
Use + beside Signing Parties to add a role, and click a role’s name to rename it. Give roles the name of the job, not the person: “Vendor signatory”, “Finance approver”, “Redpoint counsel”. A sender filling seats reads these names and needs to know who belongs in each one.The role you have selected is the one you are placing fields for. The bar above the document says so, and the field color follows it.
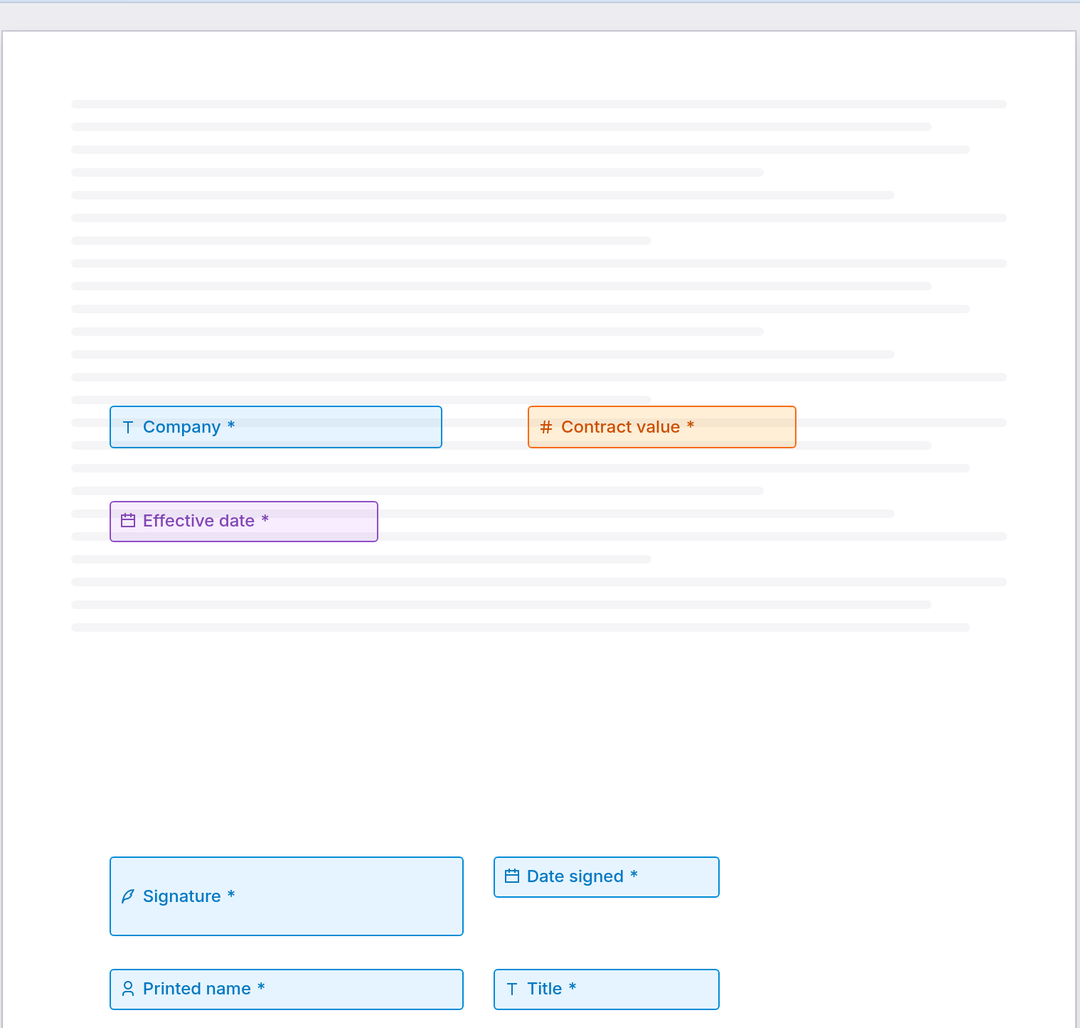
Drag a field from the palette onto the page, or click it to drop one where you are looking. Drag its edges to resize, and drag the field itself to move it. Selecting a field opens the inspector on the right.The bar above the document reads Placing fields for and names the party, with a running count of how many fields they own. The parties list carries the same counts, so an empty seat is obvious before you send anything.
Fields placed for one party, each taking that party's color. An asterisk marks a required field.
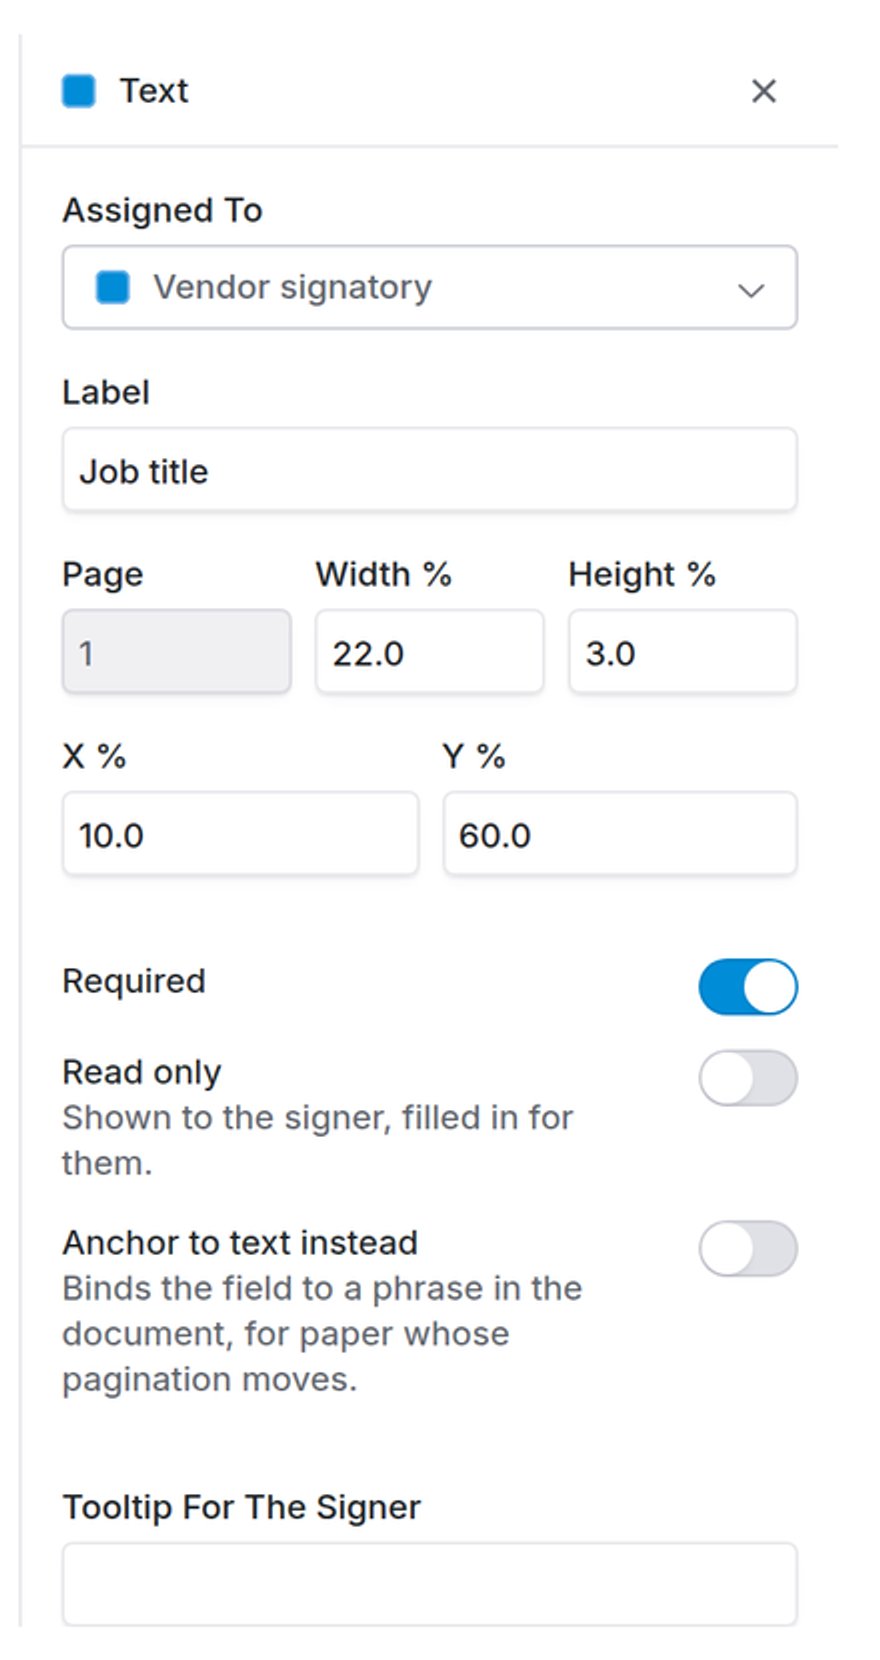
The field inspector: who owns the field, what it is called, exactly where it sits, and how it behaves for the signer.
Assigned To moves a field to a different party without redrawing it. Label is the name that appears in the box and in the envelope’s field list, so name it what it holds: “Job title”, not “Text 3”. Page, width, height and position are given as percentages, which is how you line two fields up exactly rather than by eye.Three switches decide behavior:
Required
The signer cannot finish while it is empty.
Read only
Shown to the signer, filled in for them. Use it for a value you are stating, not asking for.
Anchor to text instead
Binds the field to a phrase in the document rather than to a coordinate, for paper whose pagination moves between versions.
Tooltip for the signer is the hint they see on hover. Add one wherever a field’s label is not self-explanatory.
The three the signer applies rather than types. A signer adopts one mark and it fills every slot it covers, so an agreement with initials on every page asks for the mark once. Each slot is attributed in the sealed PDF with the signer’s name and recipient id.
Filled by the engine: Date signed, Full name, First name, Last name, Email, Note
Coverbase writes these at the moment of signing. They are placed like any other field but are never presented to the signer as something to complete, and they render read-only in the portal. Do not mark them required and expect a signer to act on them; there is nothing for them to do.
Filled by the signer: Text, Number, Date, Title, Company, Country
Free entry, with validation available in the inspector. Company is special: Coverbase pre-fills it from the vendor the envelope is filed against, and the signer can correct it. An envelope with no vendor still asks for it.
Choices: Checkbox, Dropdown
A checkbox is a single opt-in. A dropdown takes a list of options in the inspector; the portal only accepts a listed value, so a signer cannot type something you did not offer.
Preview as signer in the header shows the template the way a counterparty will see it, with each role’s fields in that role’s turn. It is the fastest way to catch a field placed on the wrong party.
Save draft keeps your work without making the template available to senders. Publish template makes it selectable in the send wizard.Publishing does not lock anything. You can keep editing a published template in place until an envelope goes out from it.
What locks a template is the first envelope sent from it, not publishing it.From that point the version is cited in an audit chain, because an envelope’s certificate records which template version it came from. Changing the template underneath would make that record wrong. The header changes to Edit as new version, and choosing it forks the template into a new draft version. Sent envelopes keep pointing at the version they cited.
A template that has been sent from. The header offers a new version rather than an in-place save.
Draft
Not available to senders. Edit freely.
Published, never sent
Available to senders. Still edit in place.
Published, sent from
Frozen. Editing forks a new version.
Archived
Hidden from the send wizard. Existing envelopes are unaffected.
Opening the send wizard against a template creates a draft envelope, and abandoning that tab leaves the draft behind. Drafts do not freeze the template, since only a sent envelope does that.
Templates appear in the send wizard’s From a template tab. Picking one copies its roles in as empty seats and its field layout onto the envelope.The copy is by value, not by reference. Editing the template afterwards does not change envelopes already created from it, so you can keep improving a template without affecting agreements that are already out.If the template set its own Default expiration, the wizard starts there; otherwise it starts at your organization’s default. Either way the sender can change it before sending.The rest of that flow is envelopes.