

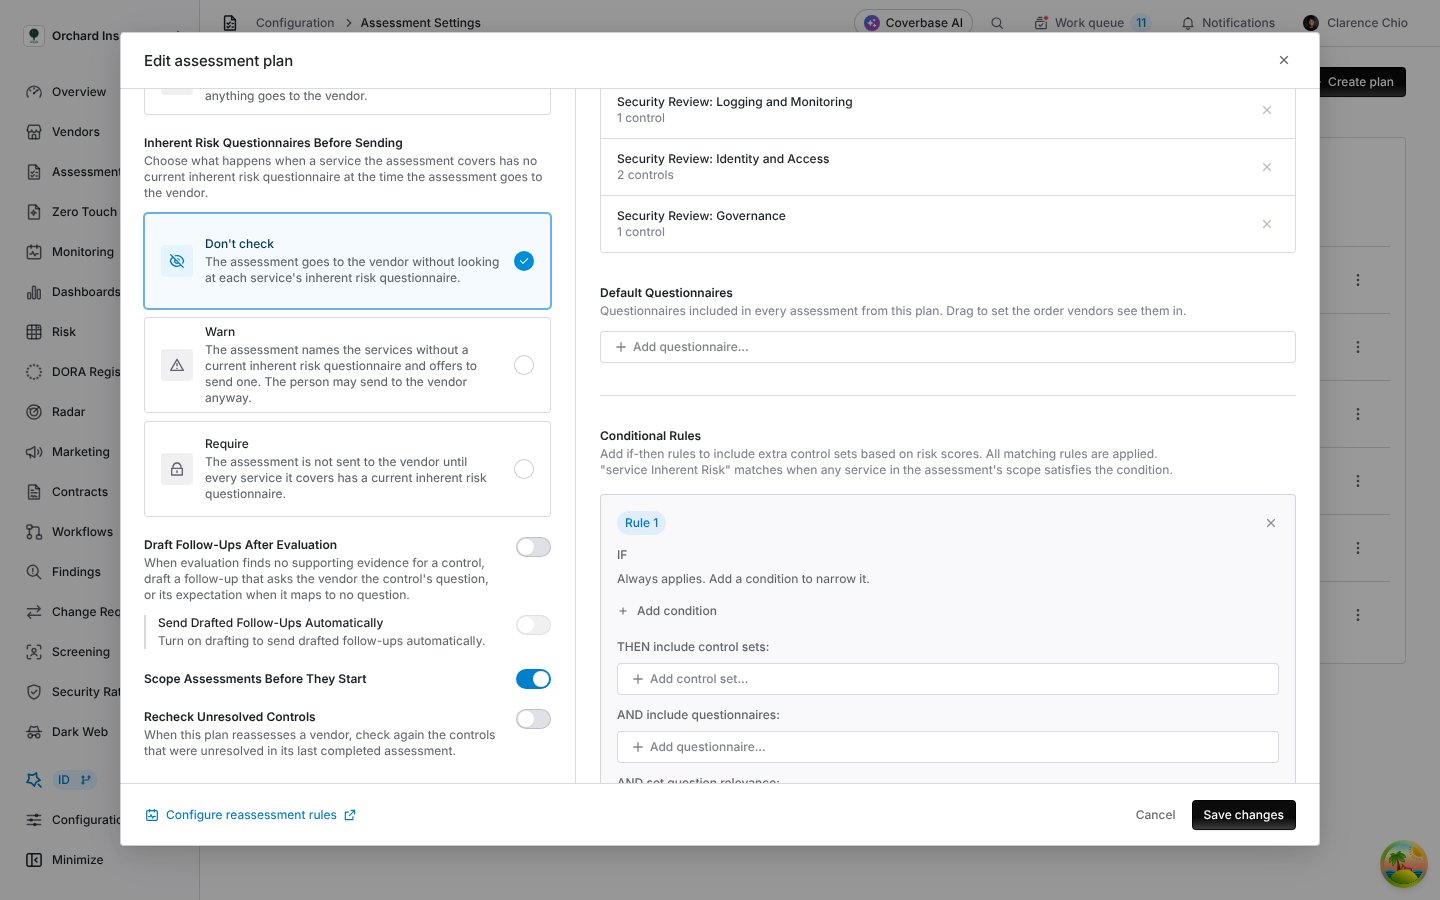
The plan option. Off by default.
Step 1: Add internal context to the vendor
Internal context is what your own team knows about the relationship: inherent risk questionnaire (IRQ) answers, application inventory records, architecture documents, notes. The vendor never sees it, and Coverbase never uses it as evidence that the vendor has a control.- Open the vendor and choose Internal Context.
- Click New context.
- Choose how to add it:
- Upload files: drop one or more PDF, Word, Excel, CSV or text files, up to 25 MB each. Before you save, each file shows what Coverbase read from it, for example Coverbase read 19 records from 1 sheet.
- From vendor documents: pick a document already on the vendor.
- Write a note: type the facts in plain text.
- Pick what the context Applies To: the whole relationship or one service, and its Source.
- Save.
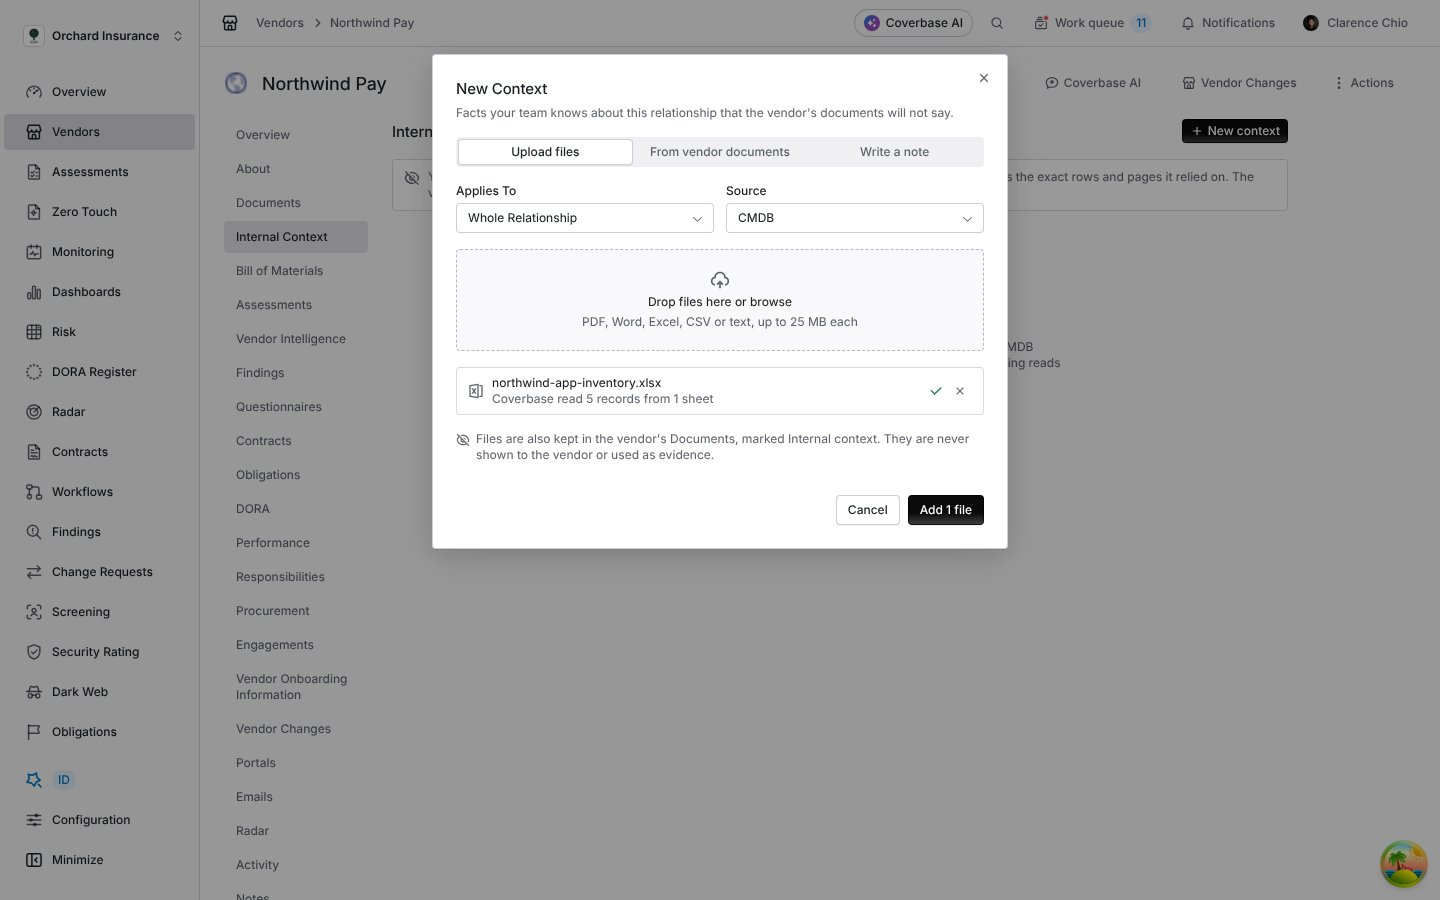
New context with two files read. Each file says what Coverbase read before you save.
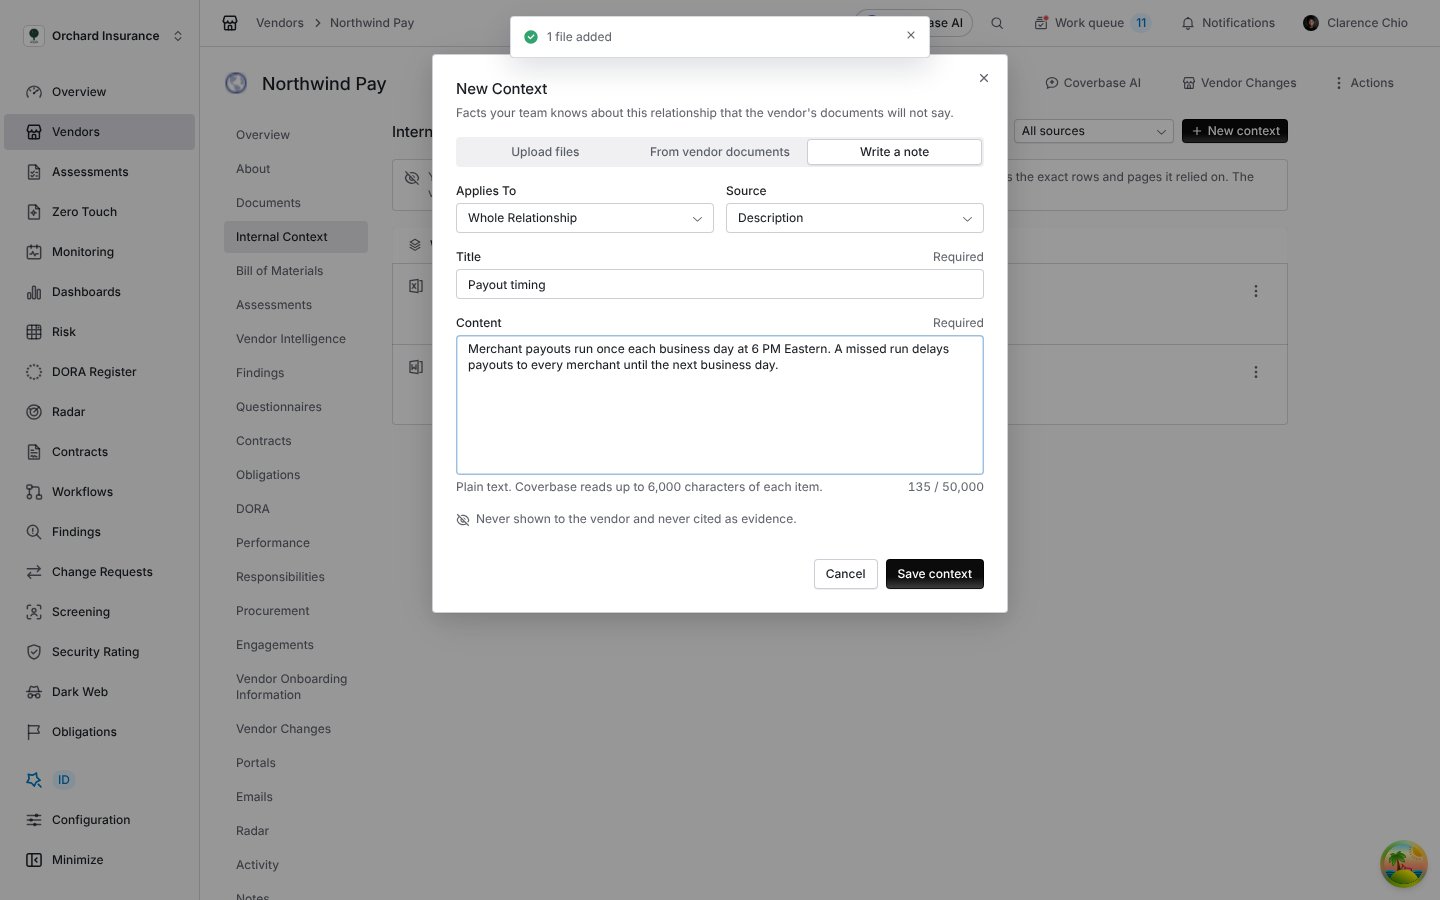
A note written by hand. It needs a title and the facts.
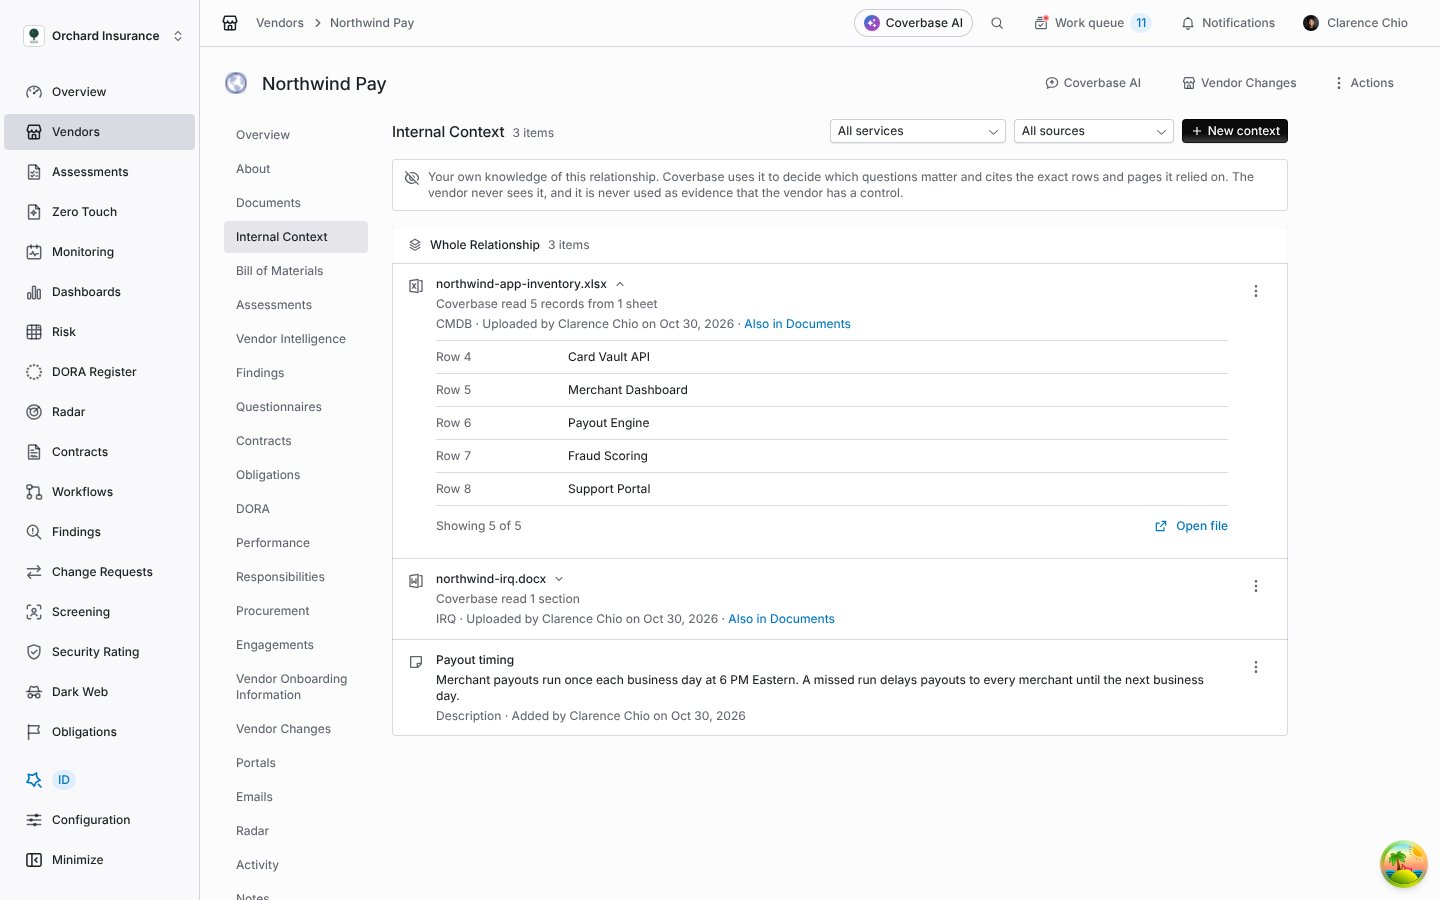
The Internal Context tab. A file opens to the records Coverbase read and where each one sits.
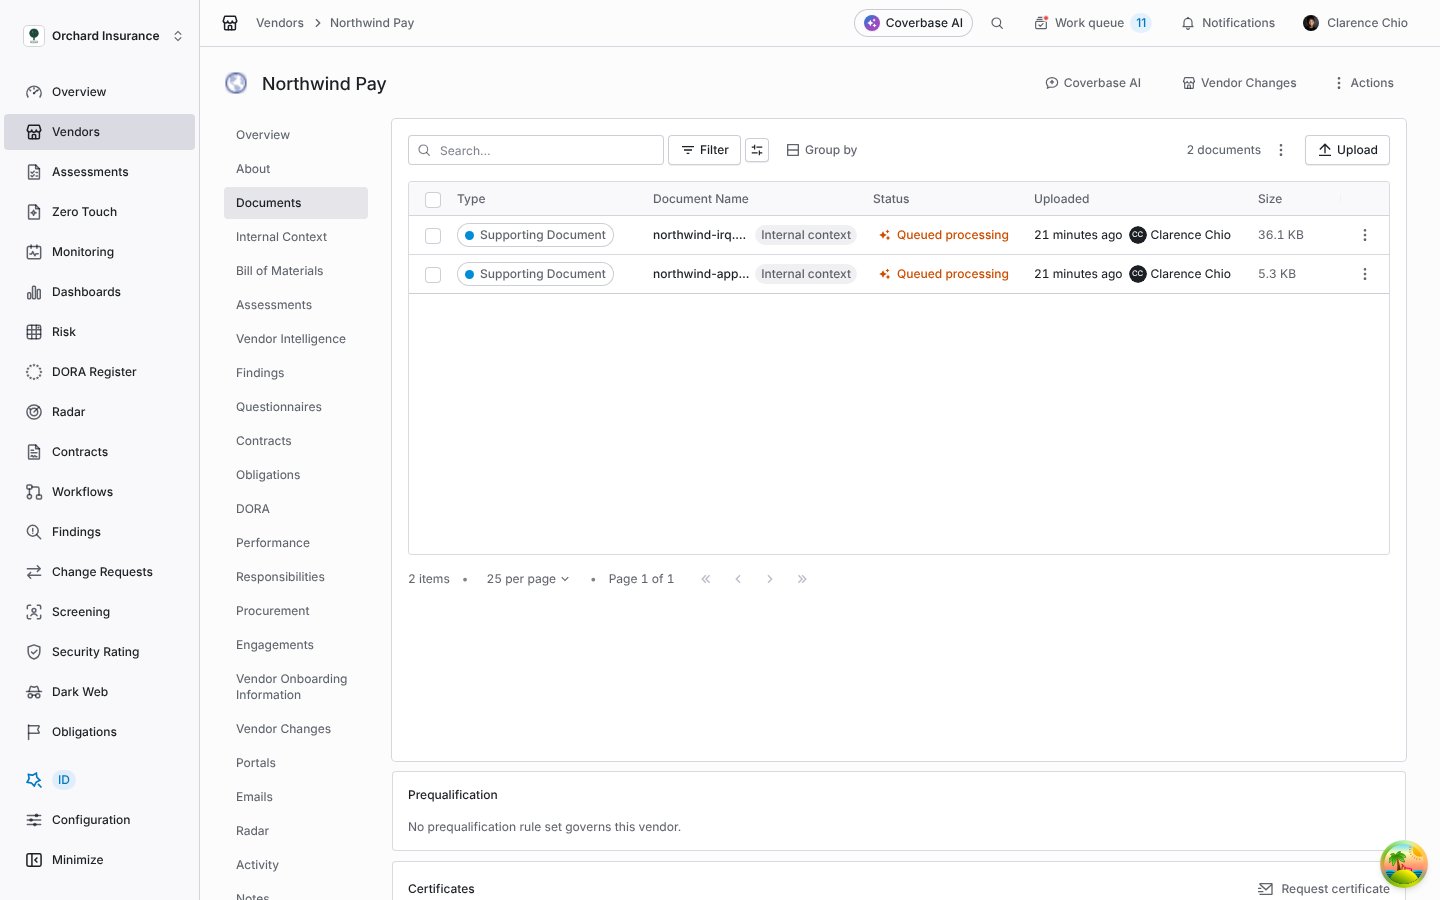
Context files on the Documents tab carry an Internal context badge.
Step 2: Set criteria on a question (optional)
A question can carry its own rules for when it matters more or less. Criteria are kept on the control, so they apply to every assessment that asks it.- Open Configuration → Controls, open the control set, and open the control.
- Choose the Scoping tab.
- Click Add criterion and pick one:
- When conditions hold: choose a relevance and add conditions. Choose whether all of these hold or any of these holds.
- When Coverbase judges a sentence true: choose a relevance and write what must be true, for example “The vendor runs AI models that make or support decisions about our customers.”
- Click Save criteria.
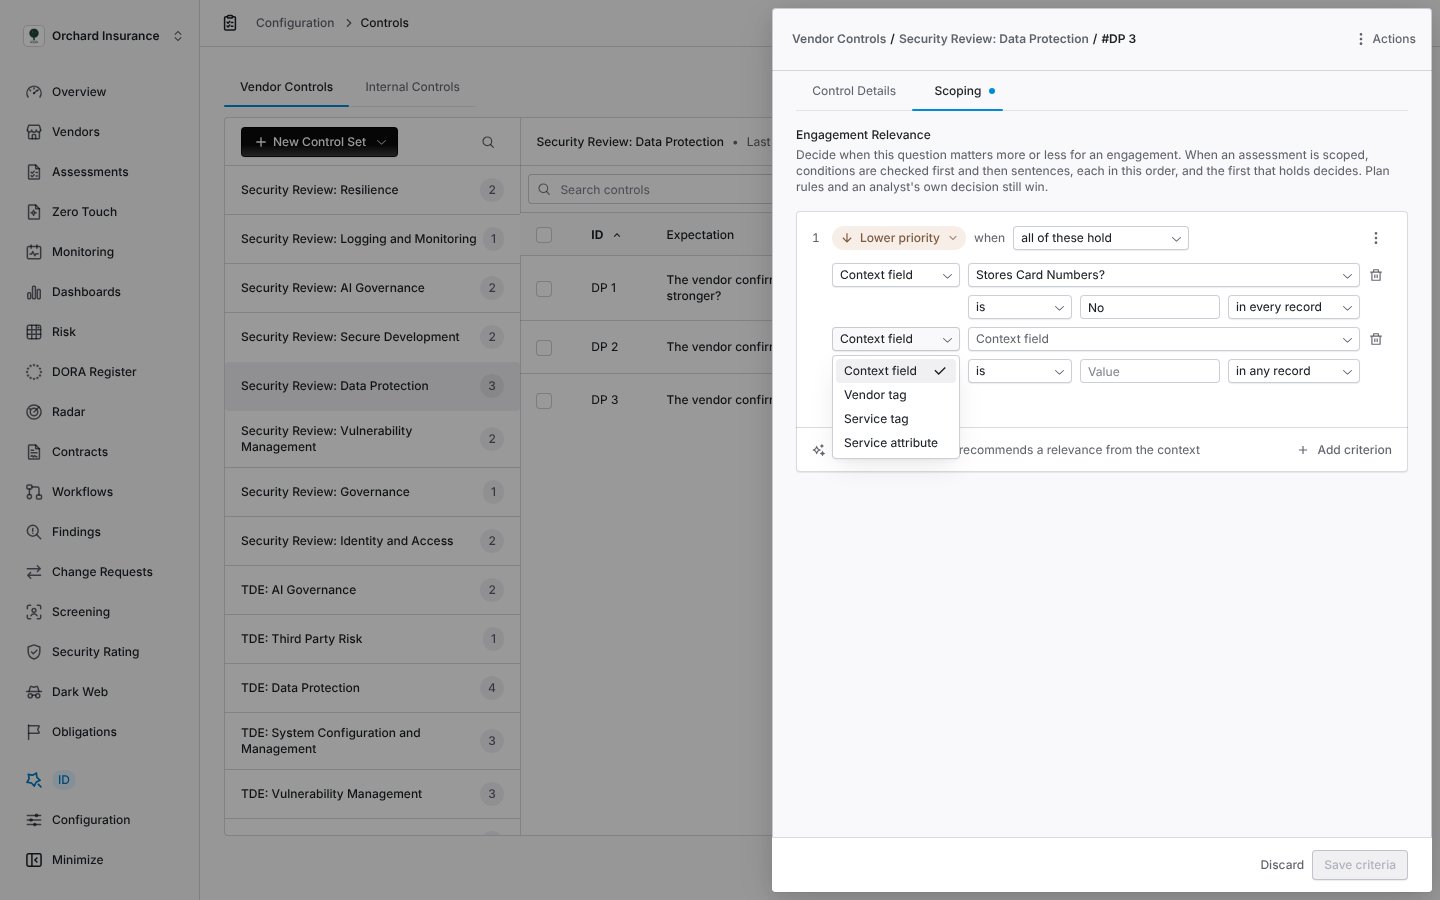
Each condition starts with what it checks.
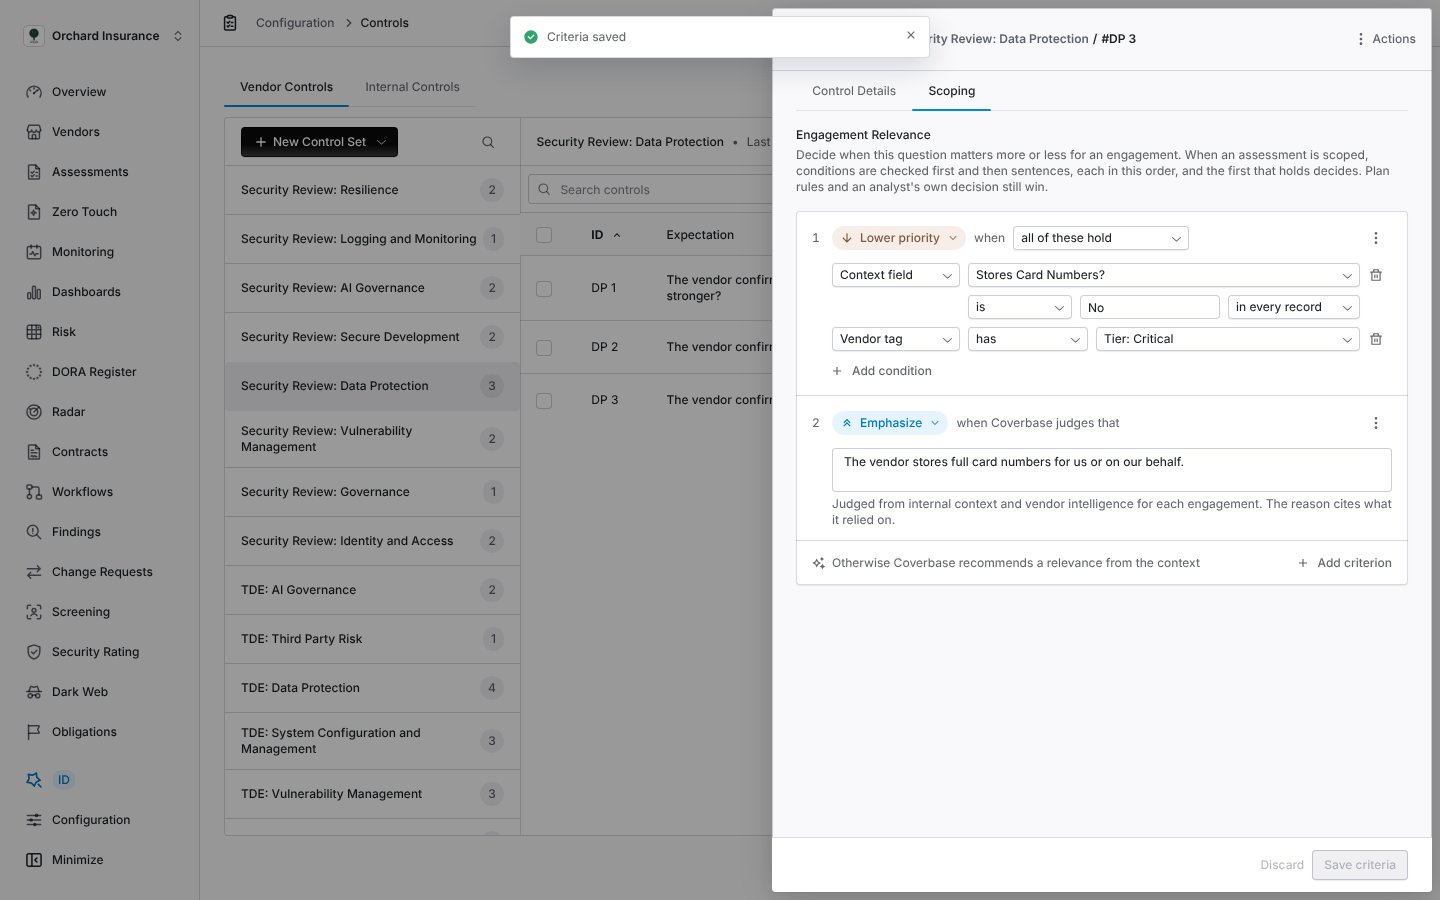
Saved criteria. Conditions are checked first, then sentences, each in the order listed.
Step 3: Create the assessment and watch the scope run
Create the assessment as usual. Coverbase opens it on the Scoping tab and starts the recommendation at once. A progress bar shows how many questions are scoped. You can leave the page while it runs.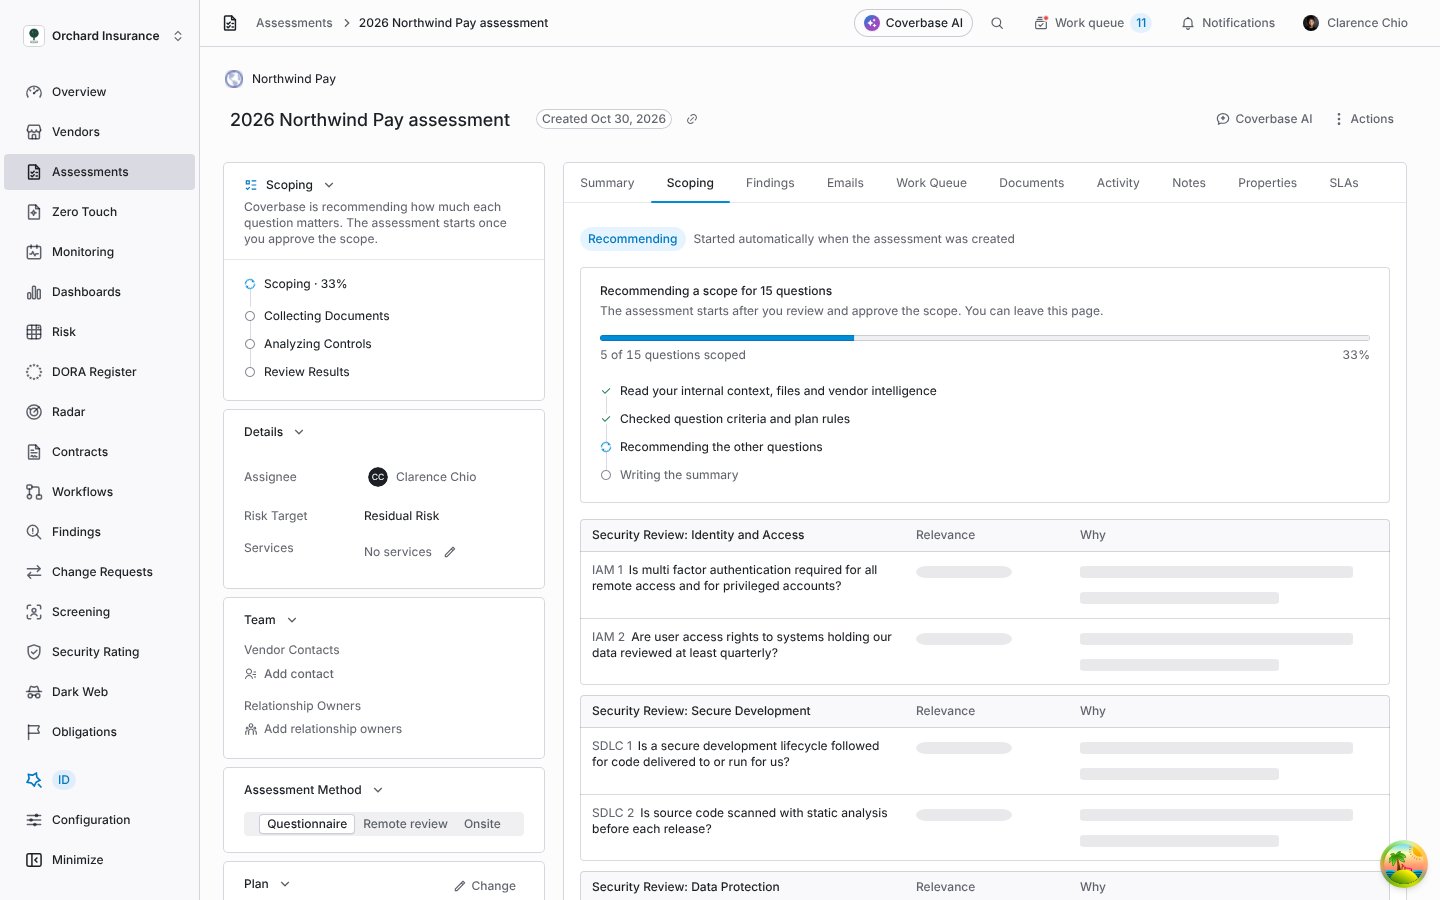
A scope being recommended. The status card shows the Scoping step ahead of Collecting Documents.
- the vendor’s internal context, notes and files
- the services in the assessment and their tags
- the vendor’s intelligence: security posture, financial health, compliance and legal, and radar alerts from the last year
- each question’s criteria and your assessment plan’s rules
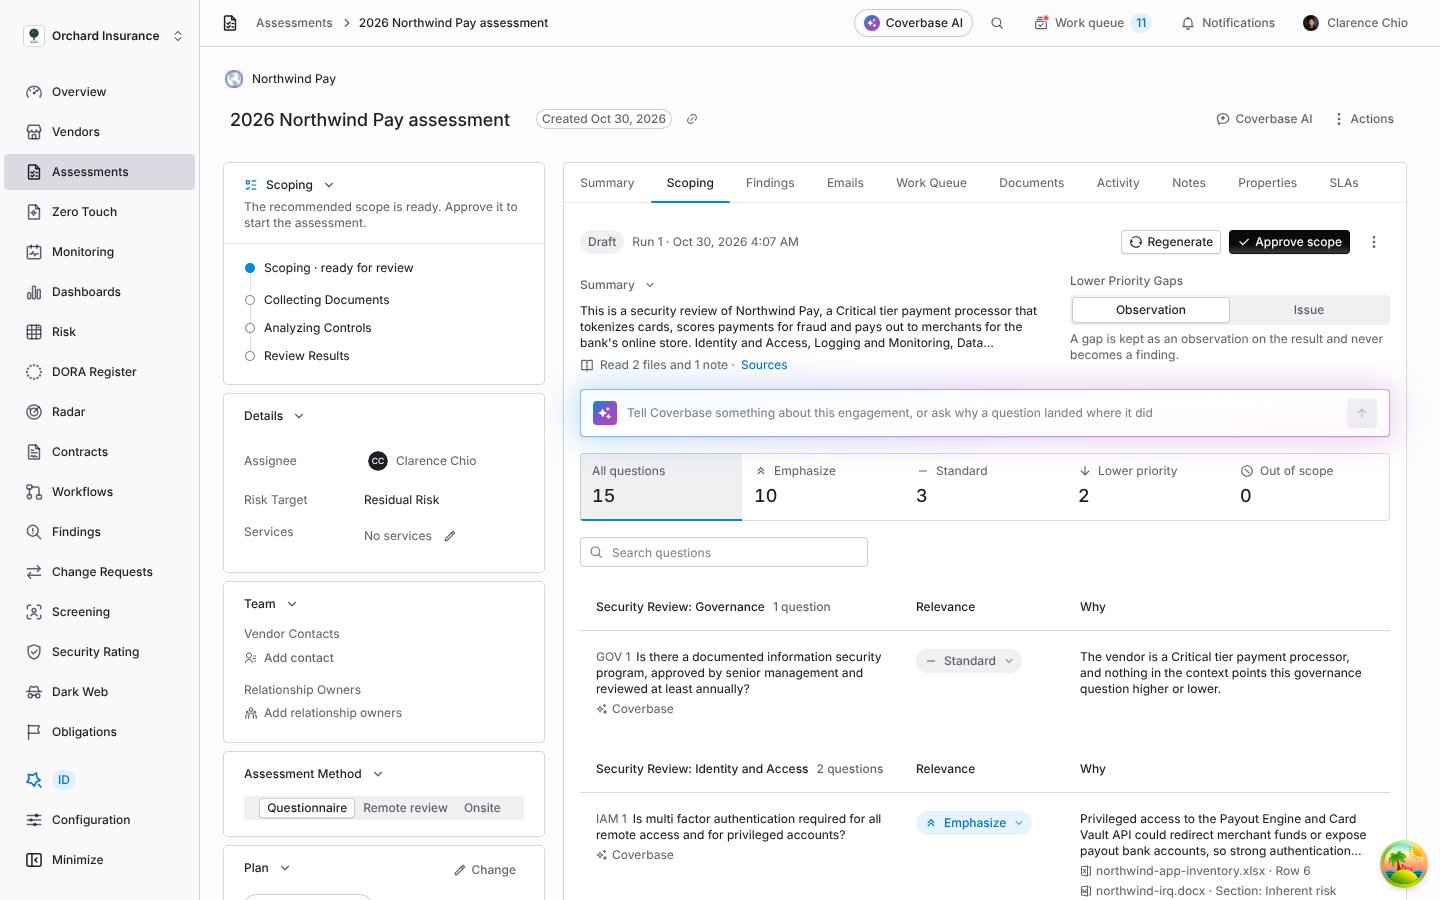
A recommended scope ready for review.
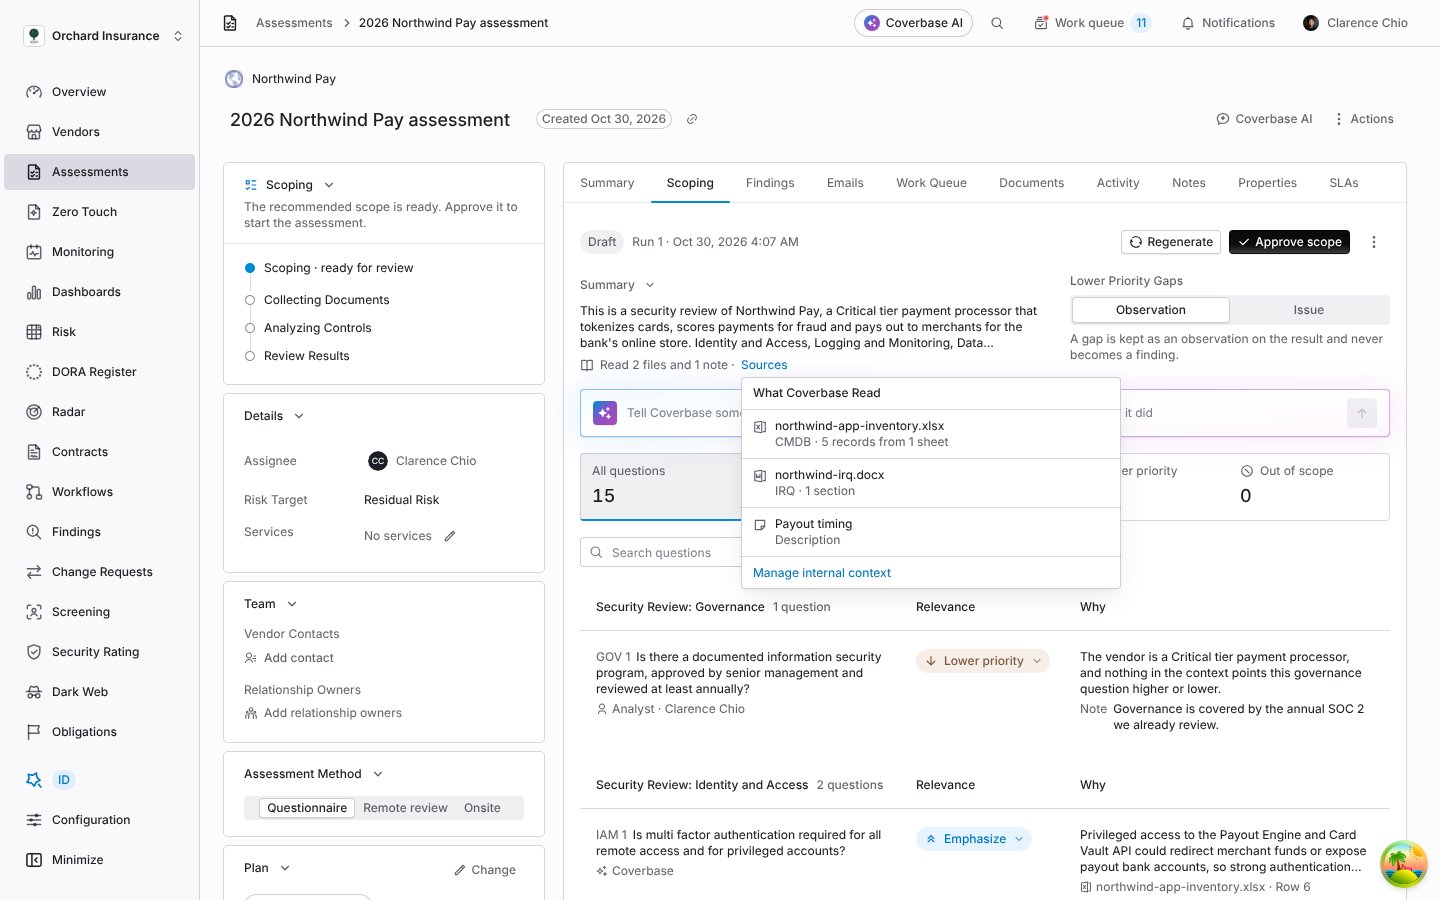
Sources lists every context item and intelligence section the run read.
Step 4: Review the recommendation
Each question shows its relevance and why. Under each reason are the sources it cites. Click a source to see the quoted words and where they sit, for example Row 5 of a workbook, and click Open file to see the file.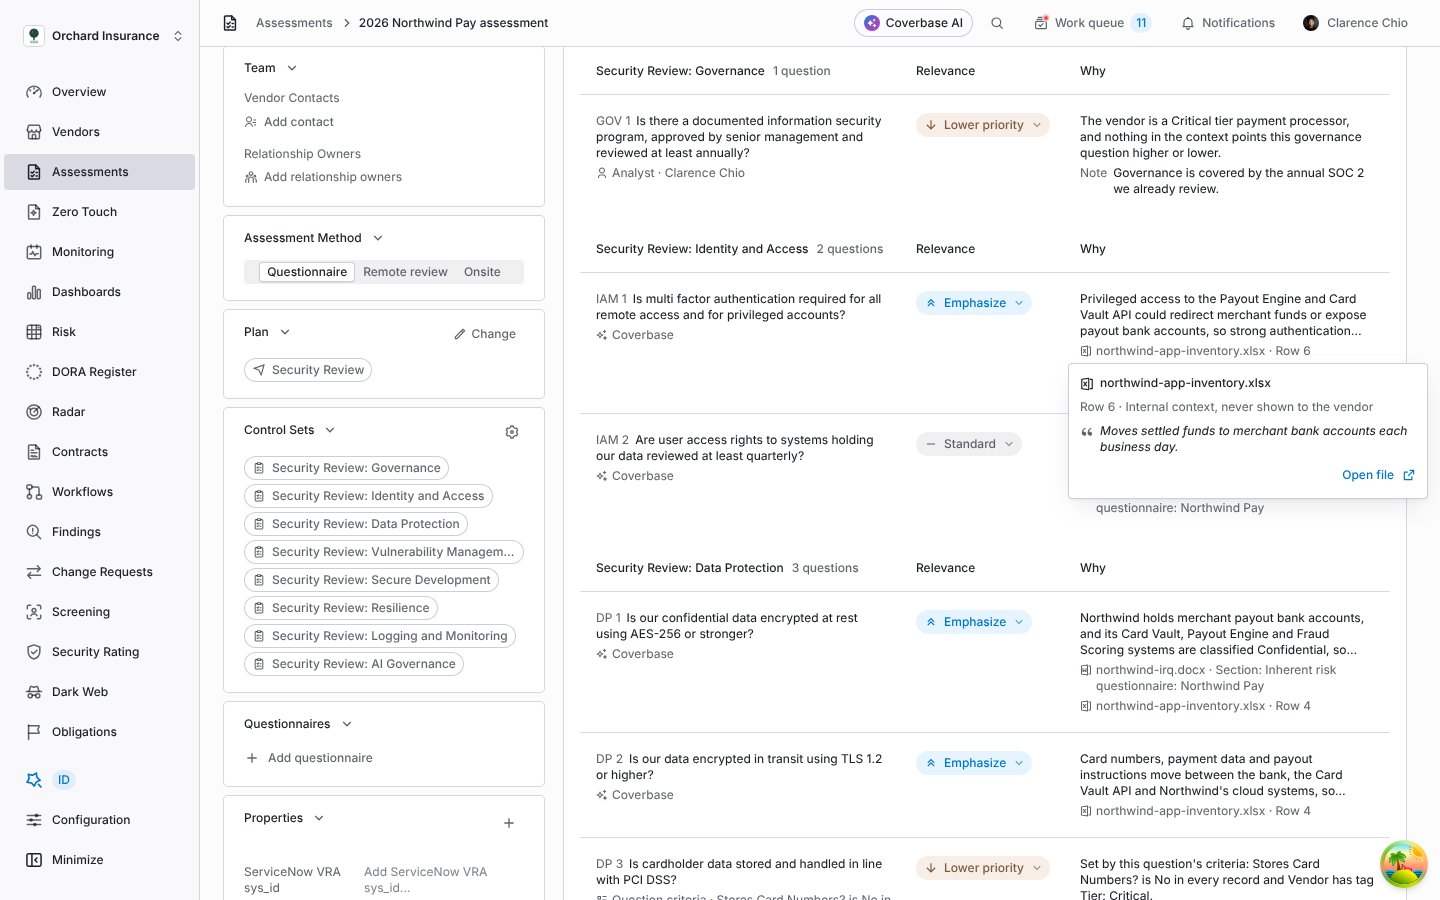
A citation opens to the quoted words and where they sit.
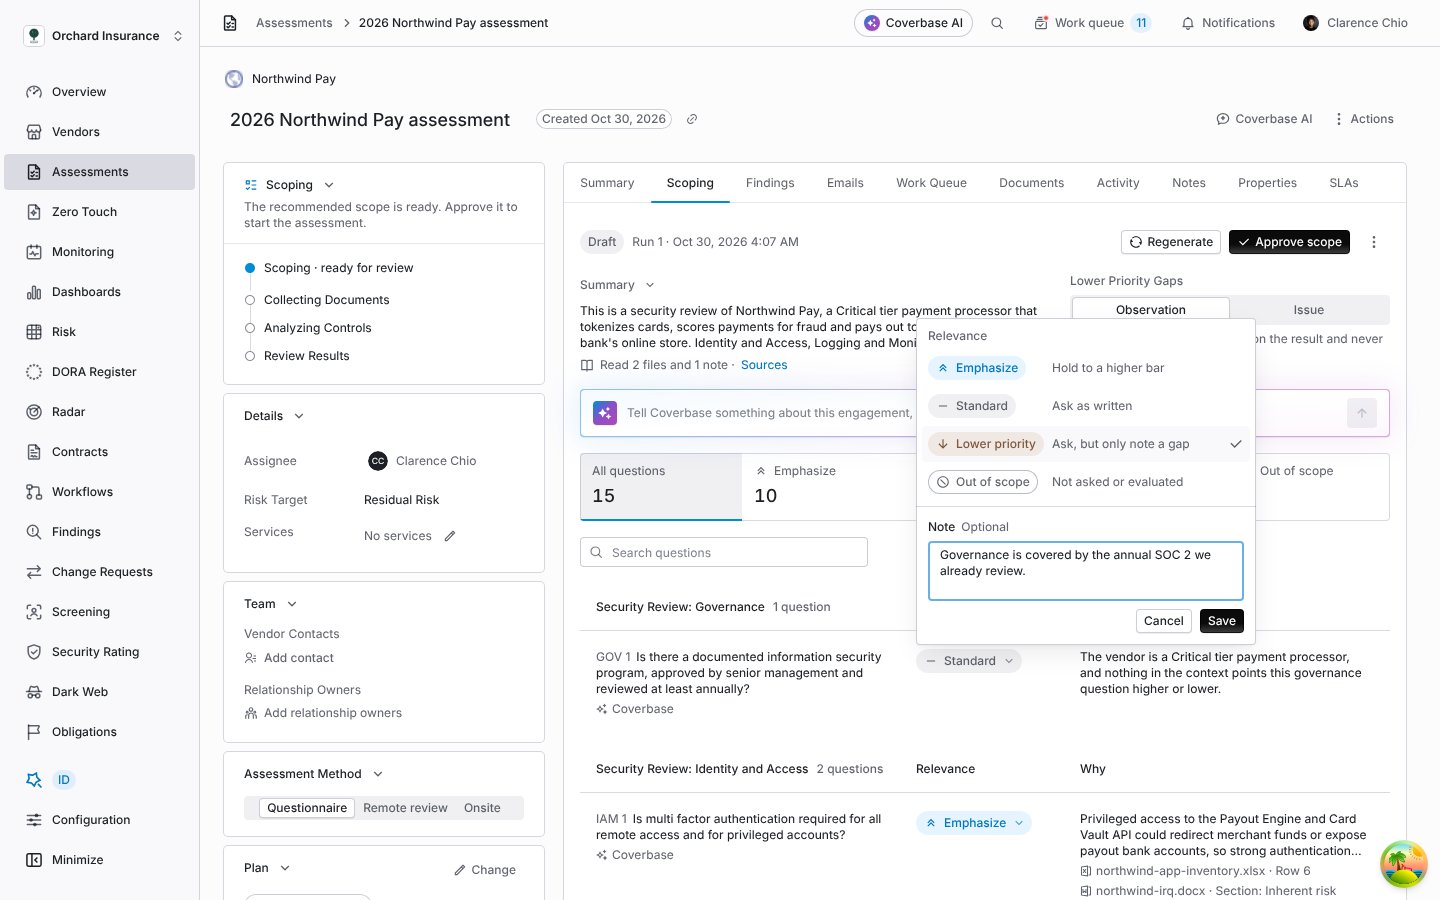
Changing a question's relevance. The note is for second line reviewers.
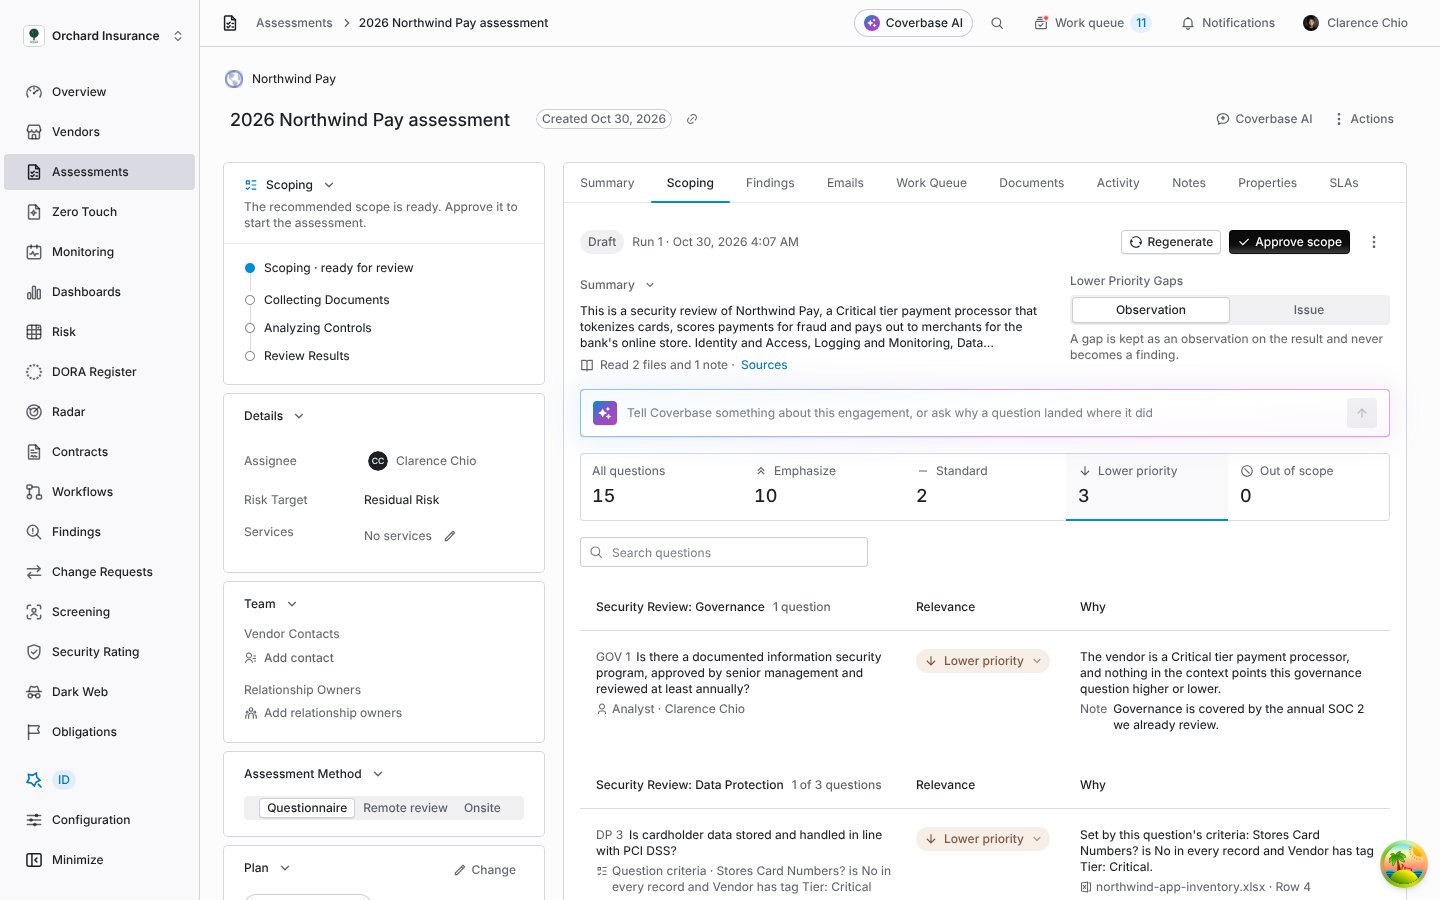
Filtered to Lower priority. Each question says who decided it.
Step 5: Add context through the chat
Use the box above the questions to tell Coverbase something about the engagement, or to ask why a question landed where it did. For example: “The wallet app never stores full card numbers. Cards are tokenized before they reach the vendor.” When the answer would change the scope, Coverbase shows a proposal: the note it would save as internal context, and each question it would move, with the reason and its sources. Nothing changes until you click Apply. Dismiss changes nothing.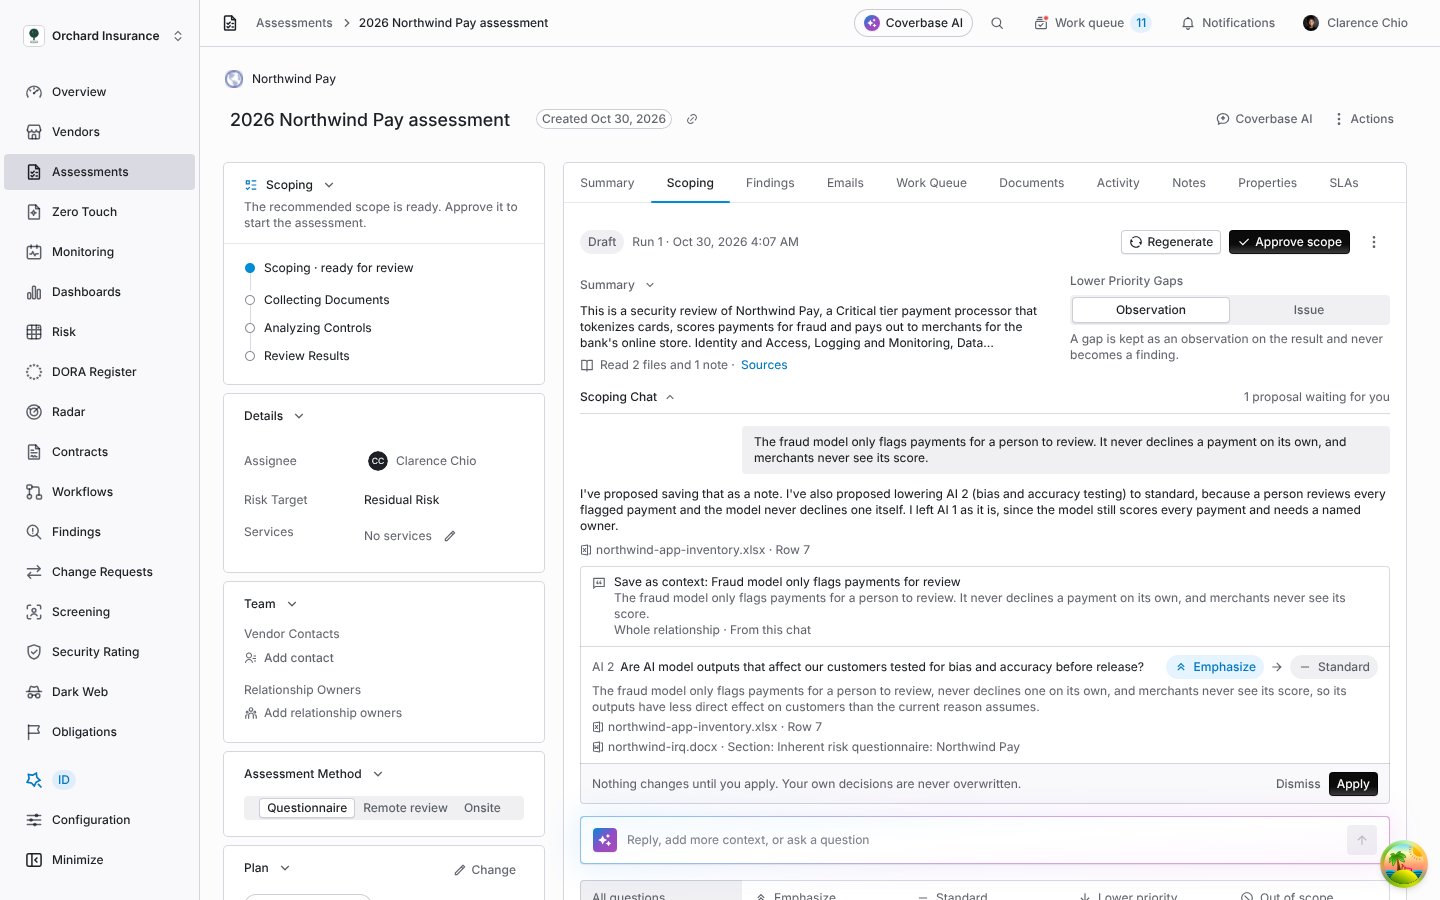
A proposal from the chat. Nothing changes until you apply it.
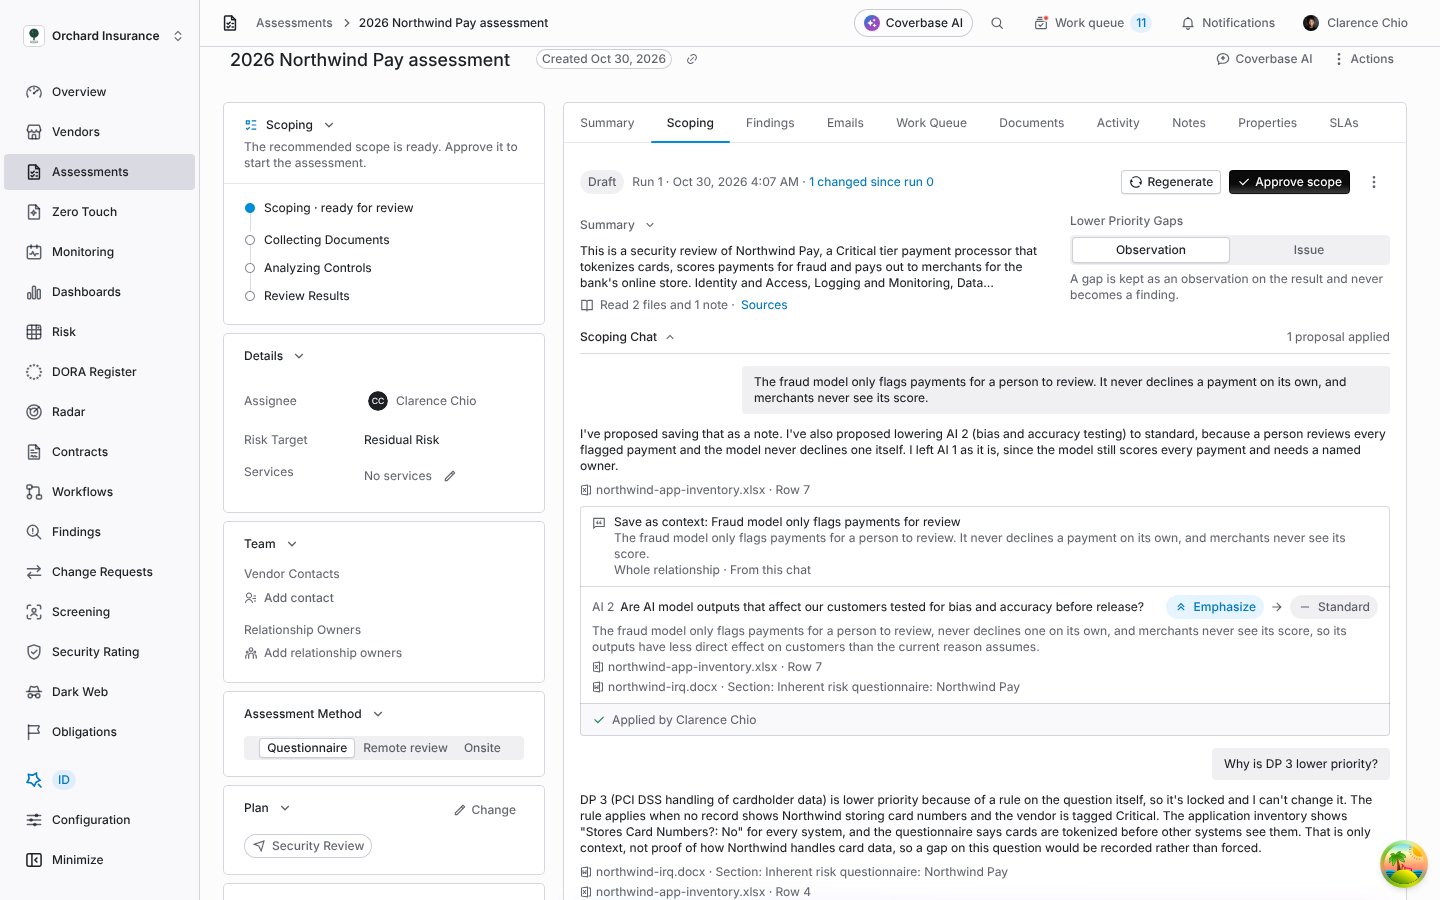
Ask why a question landed where it did.
Step 6: Approve the scope
Click Approve scope. The dialog lists how many questions are in each relevance and what each one means for the evaluation. Click Approve and start. The assessment starts and Coverbase begins collecting evidence.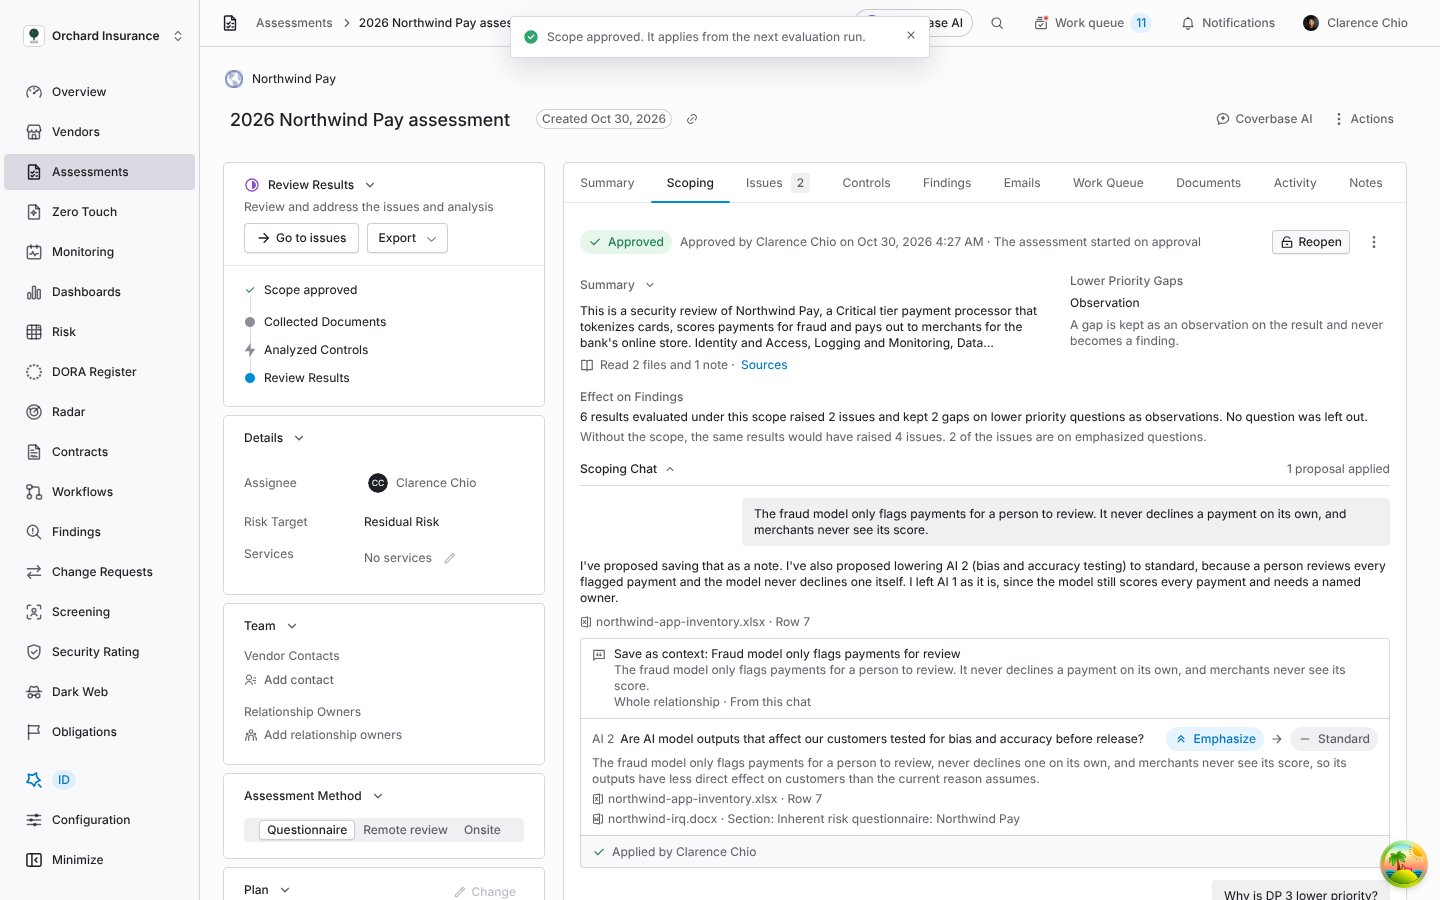
Approving starts the assessment.
Skip scoping
To run an assessment without a scope, click Skip scoping, next to Approve scope or under a recommendation that is still running, and confirm. The assessment starts at once as if scoping were off: every question is asked and evaluated as written. The status card shows Scoping skipped, and the Scoping tab says who skipped it and when. To scope it after all, click Scope this assessment. The assessment keeps running, and an approved scope applies from the next evaluation run.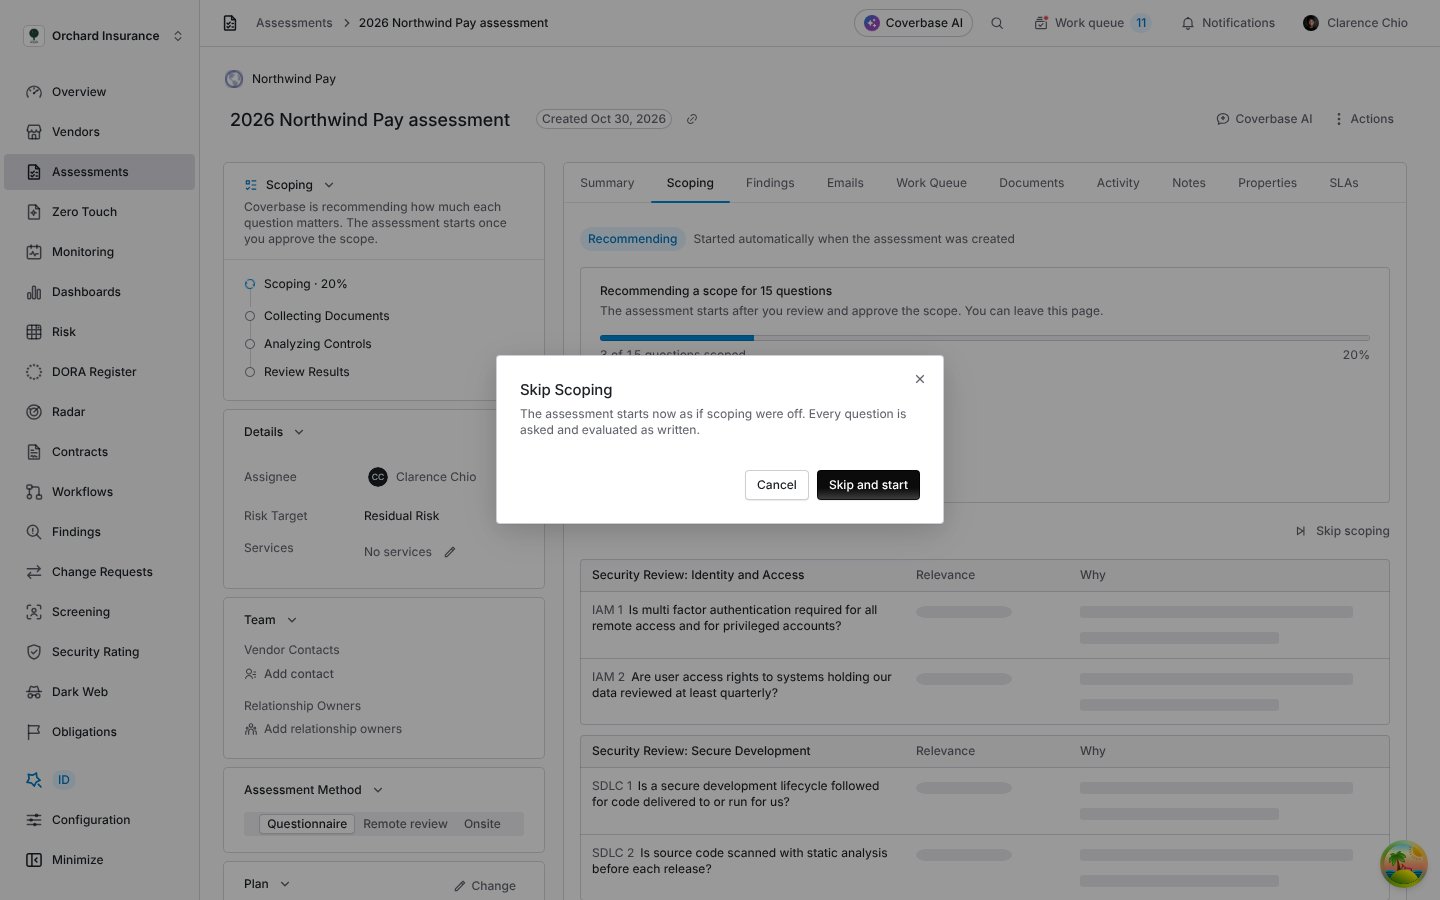
Skipping starts the assessment as if scoping were off.
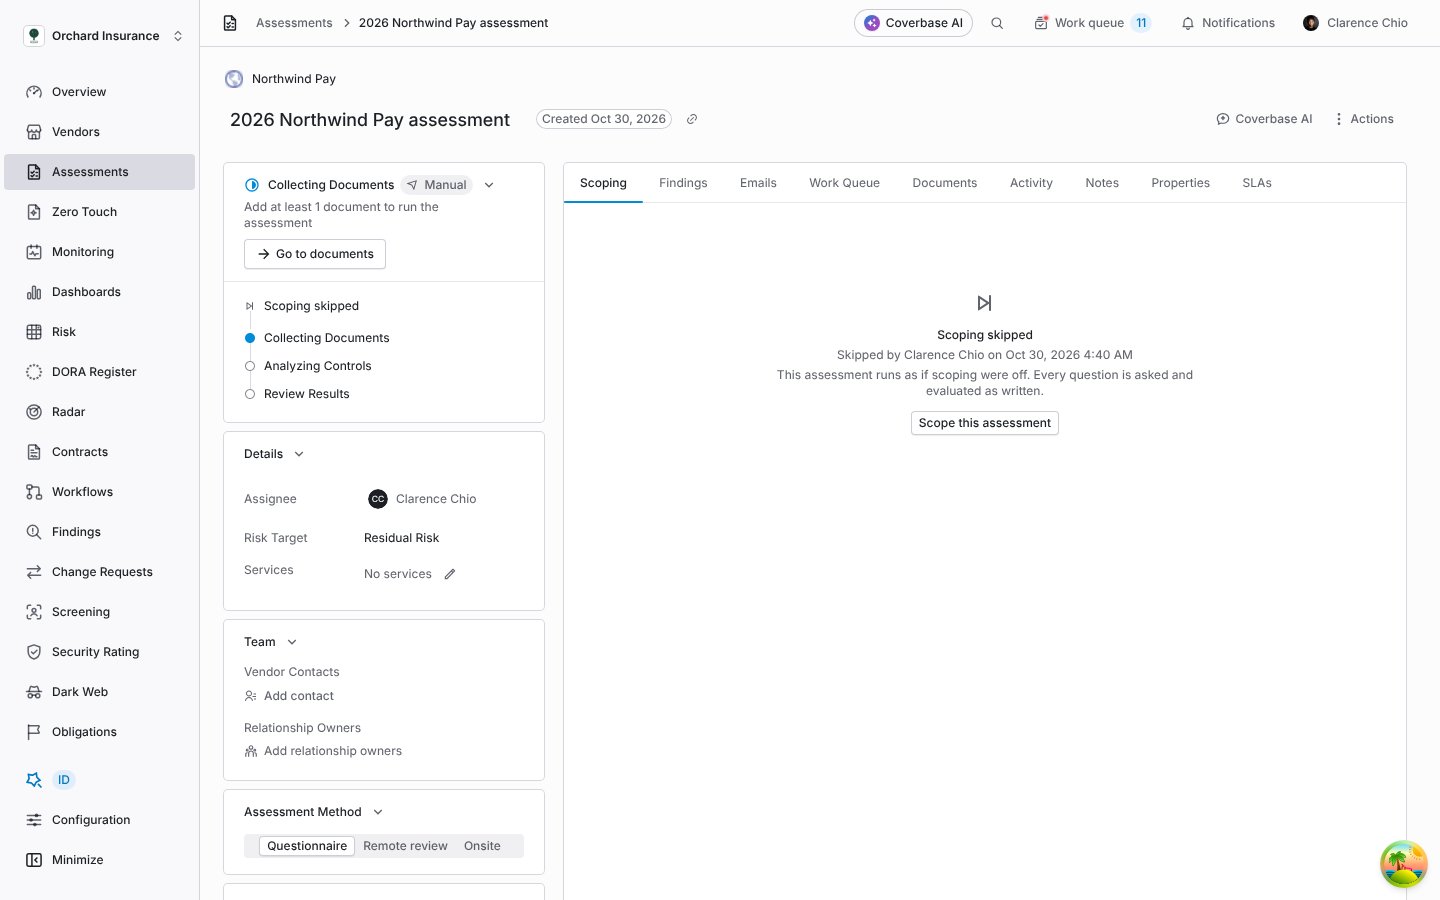
A skipped scope. The status card and the Scoping tab both say so.
Step 7: See what the scope changed
Once results are evaluated under the approved scope, the Scoping tab shows Effect on Findings: how many issues the results raised, how many gaps on lower priority questions were kept as observations, how many out of scope questions were left out, and how many issues the same results would have raised without the scope.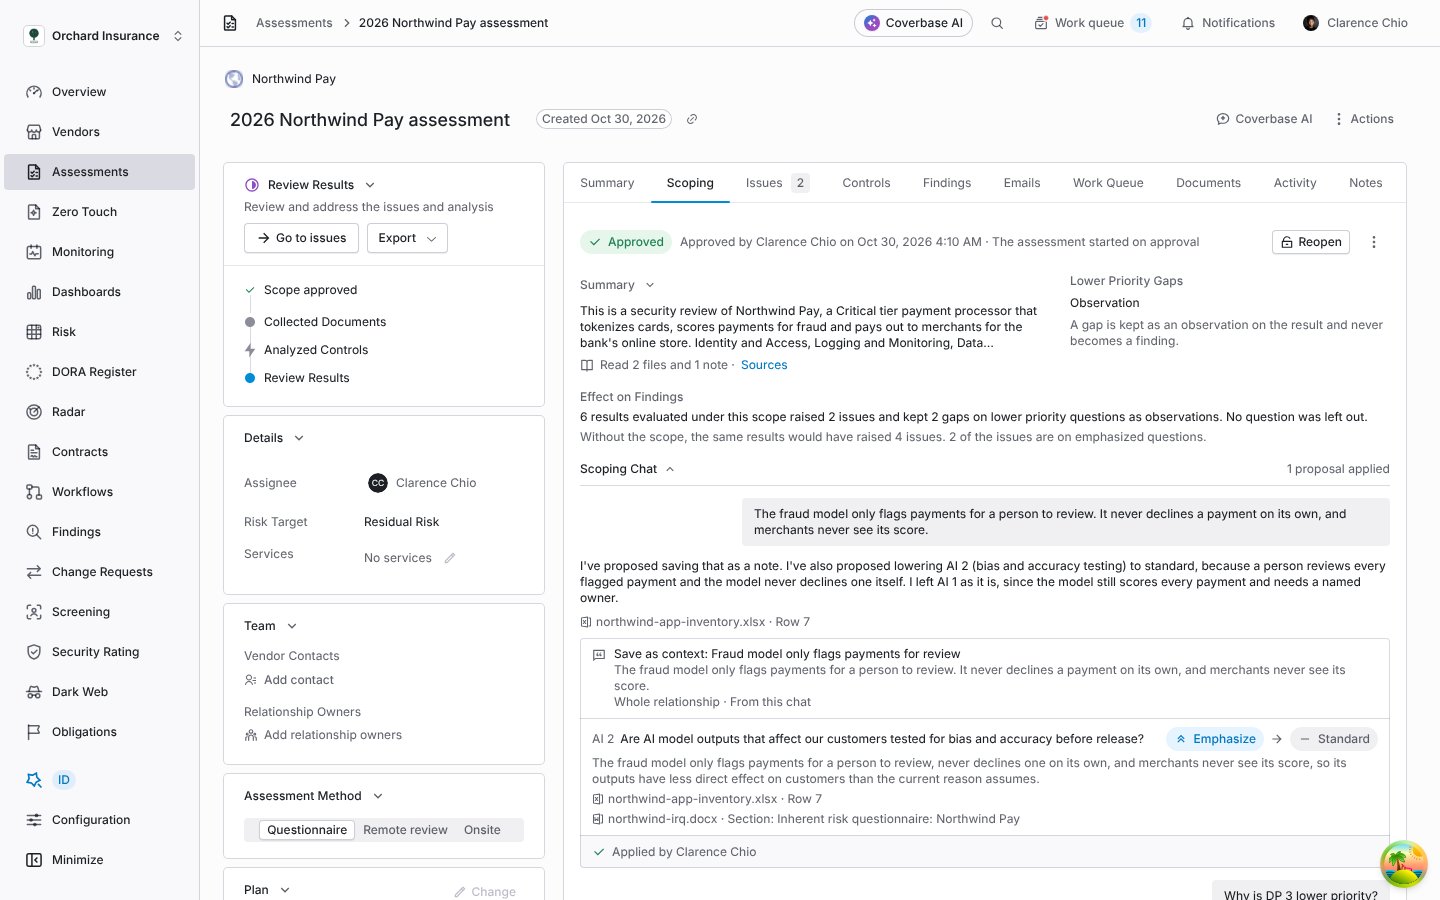
An approved scope and its effect on the results evaluated under it.
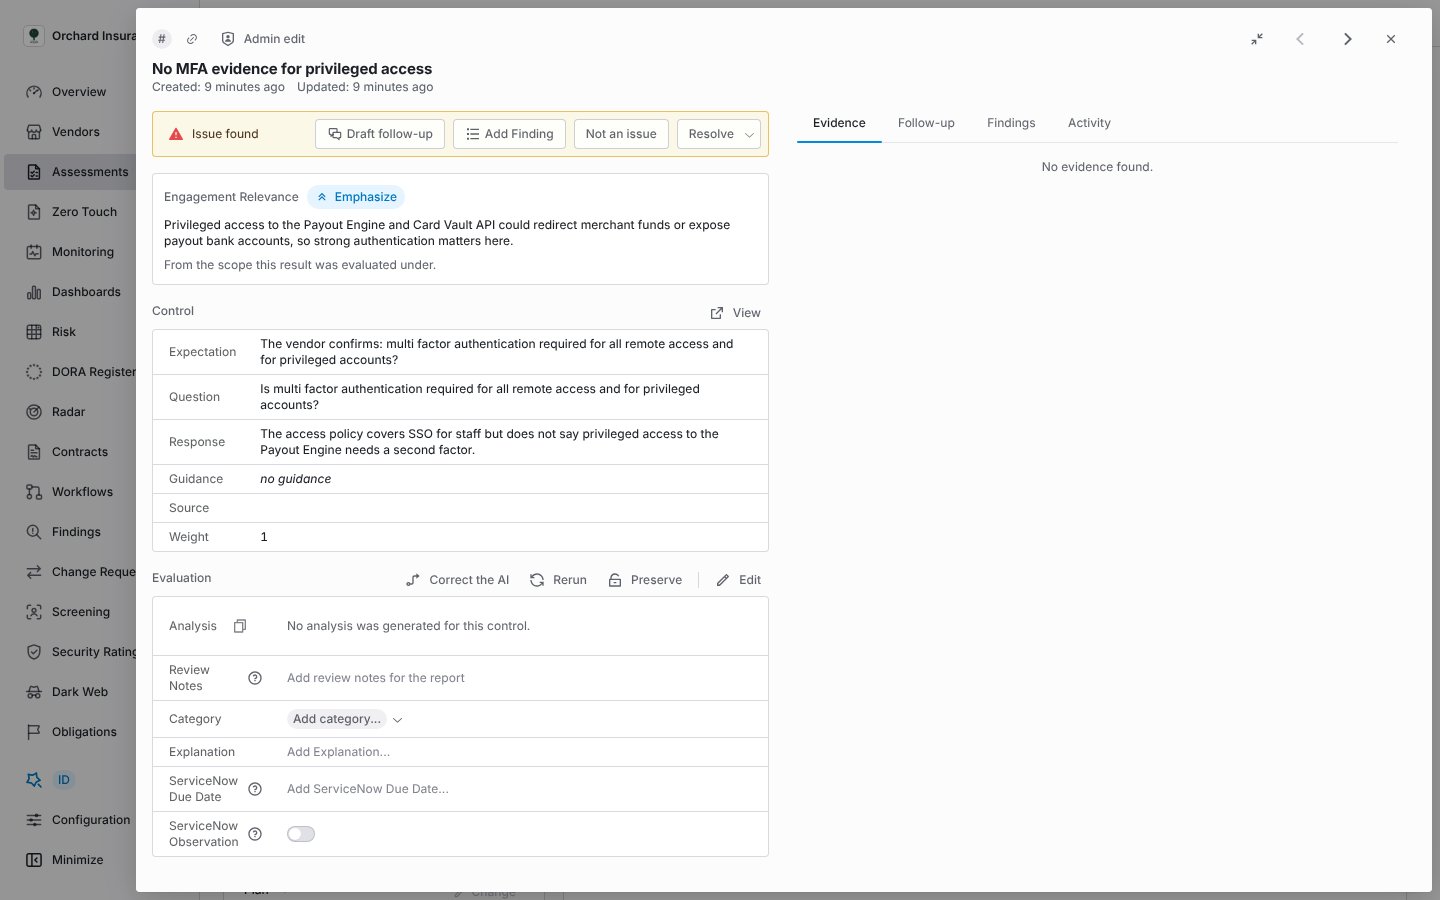
An issue on an emphasized question says why it matters here.
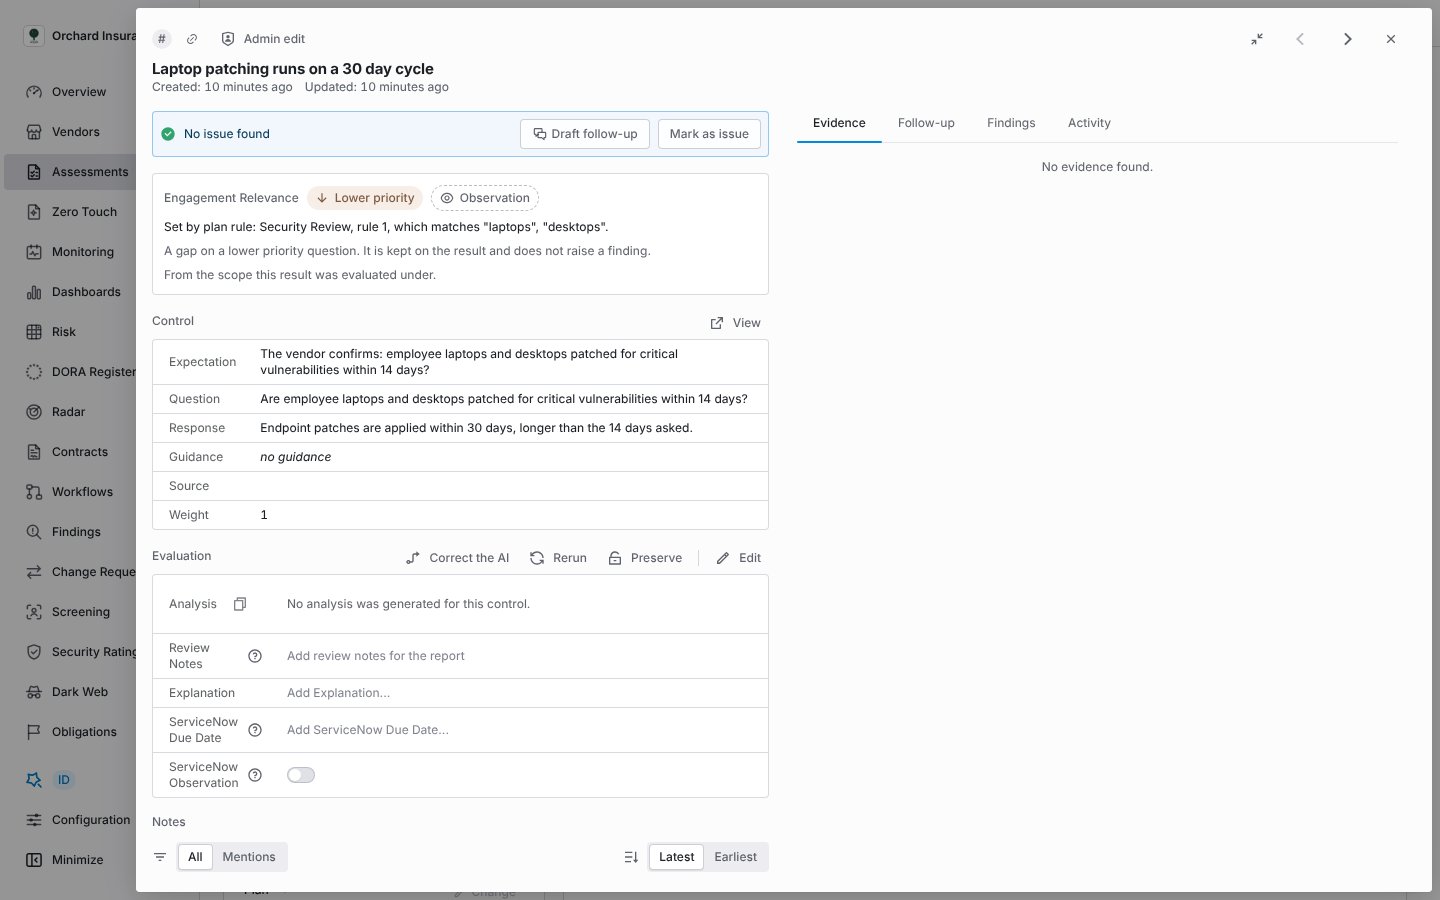
A gap on a lower priority question is kept as an observation.
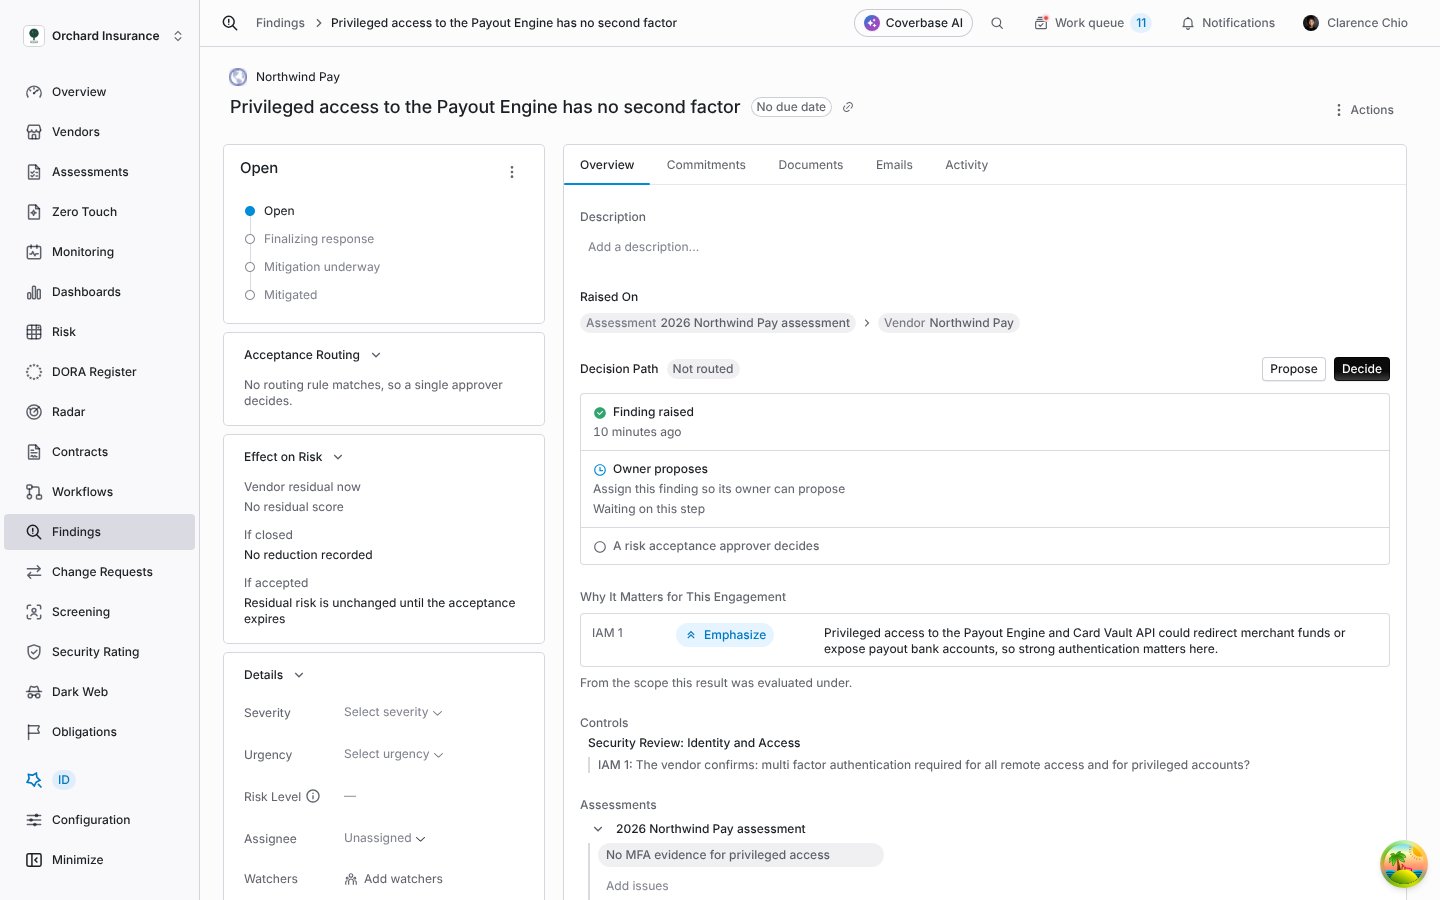
A finding carries the relevance of each question it came from.